Affiliate disclosure: This original Elegant Creators recreation guide contains affiliate links. As an Amazon Associate I earn from qualifying purchases. If you purchase through a link, we may earn a commission at no additional cost to you.
A green balloon wall feels luxurious when the palette is restrained, the silhouette is asymmetrical and every attachment is planned before inflation. This guide interprets a proven botanical-green concept as a new Elegant Creators recreation—not as photographs or verified construction details from the source installation. Every quantity, method and price range below is an estimate you should adapt to your venue.
The design concept and palette
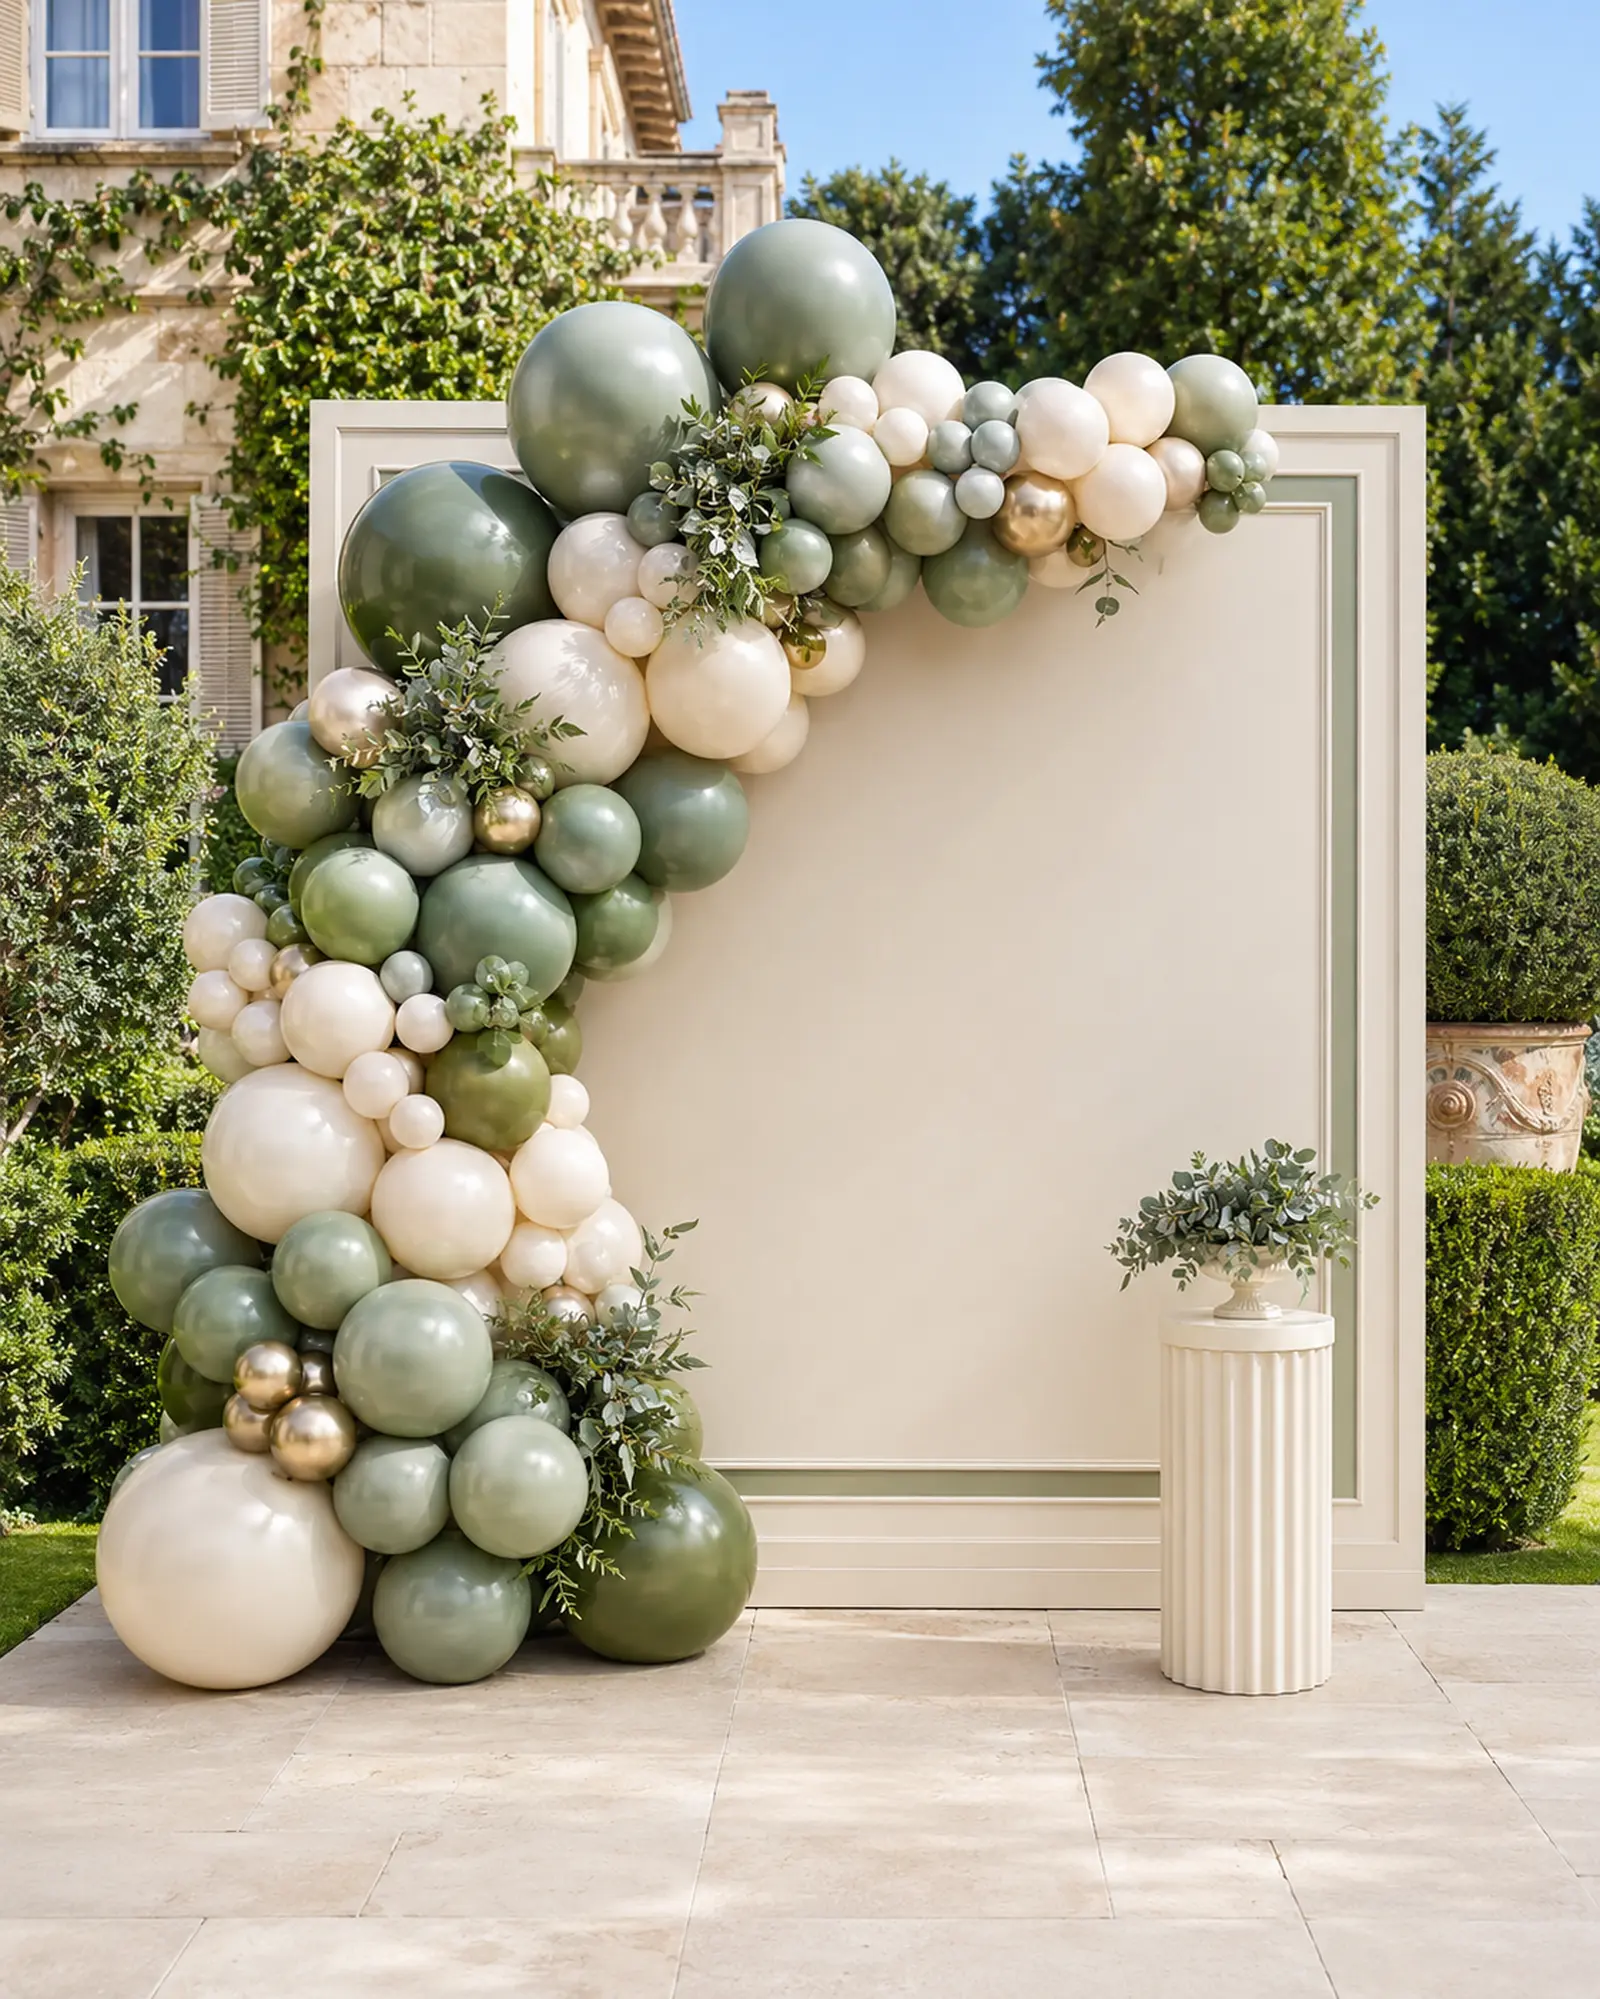
The 8-by-8-foot warm-ivory paneled wall is framed by a heavy organic sweep that rises from the lower left, travels across the top and finishes at the upper right. A smaller lower-right cluster balances the composition without closing the guest area. Use eucalyptus and sage as the dominant colors, warm ivory to create light, deep olive for shadow, and small champagne-pearl and muted-bronze accents for a polished finish.
Estimated balloon recipe
- 5-inch balloons: 90–120, mostly sage and ivory, for fillers and transitions.
- 11-inch balloons: 110–140, split across eucalyptus, sage, ivory and olive.
- 16–18-inch balloons: 18–24 for rhythm and focal points.
- 24-inch balloons: 4–6, used low and near structural turns rather than overhead.
- Optional metallic accents: 12–18 small balloons; keep them under 10% of the visible design.
Expect roughly 235–305 balloons for this density. Add 10% for breakage and color matching. Outdoor heat changes balloon size and pressure, so slightly underinflate and test one balloon first.
Essential supplies
- Professional-quality latex balloons in the five-color palette — Check current price on Amazon (affiliate link).
- Dual-nozzle electric pump — Check current price on Amazon (affiliate link).
- Balloon strip, removable glue dots, 50-pound clear line and reusable cable ties — Check current price on Amazon (affiliate link).
- 8-by-8-foot freestanding backdrop with rated bases, ballast, clamps, tape measure, step ladder, safety ties and hand pump.
Optional upgrades
Add premium eucalyptus stems, custom lettering, a soft floor light, or a second narrow panel. Decorative greenery must never carry structural load.
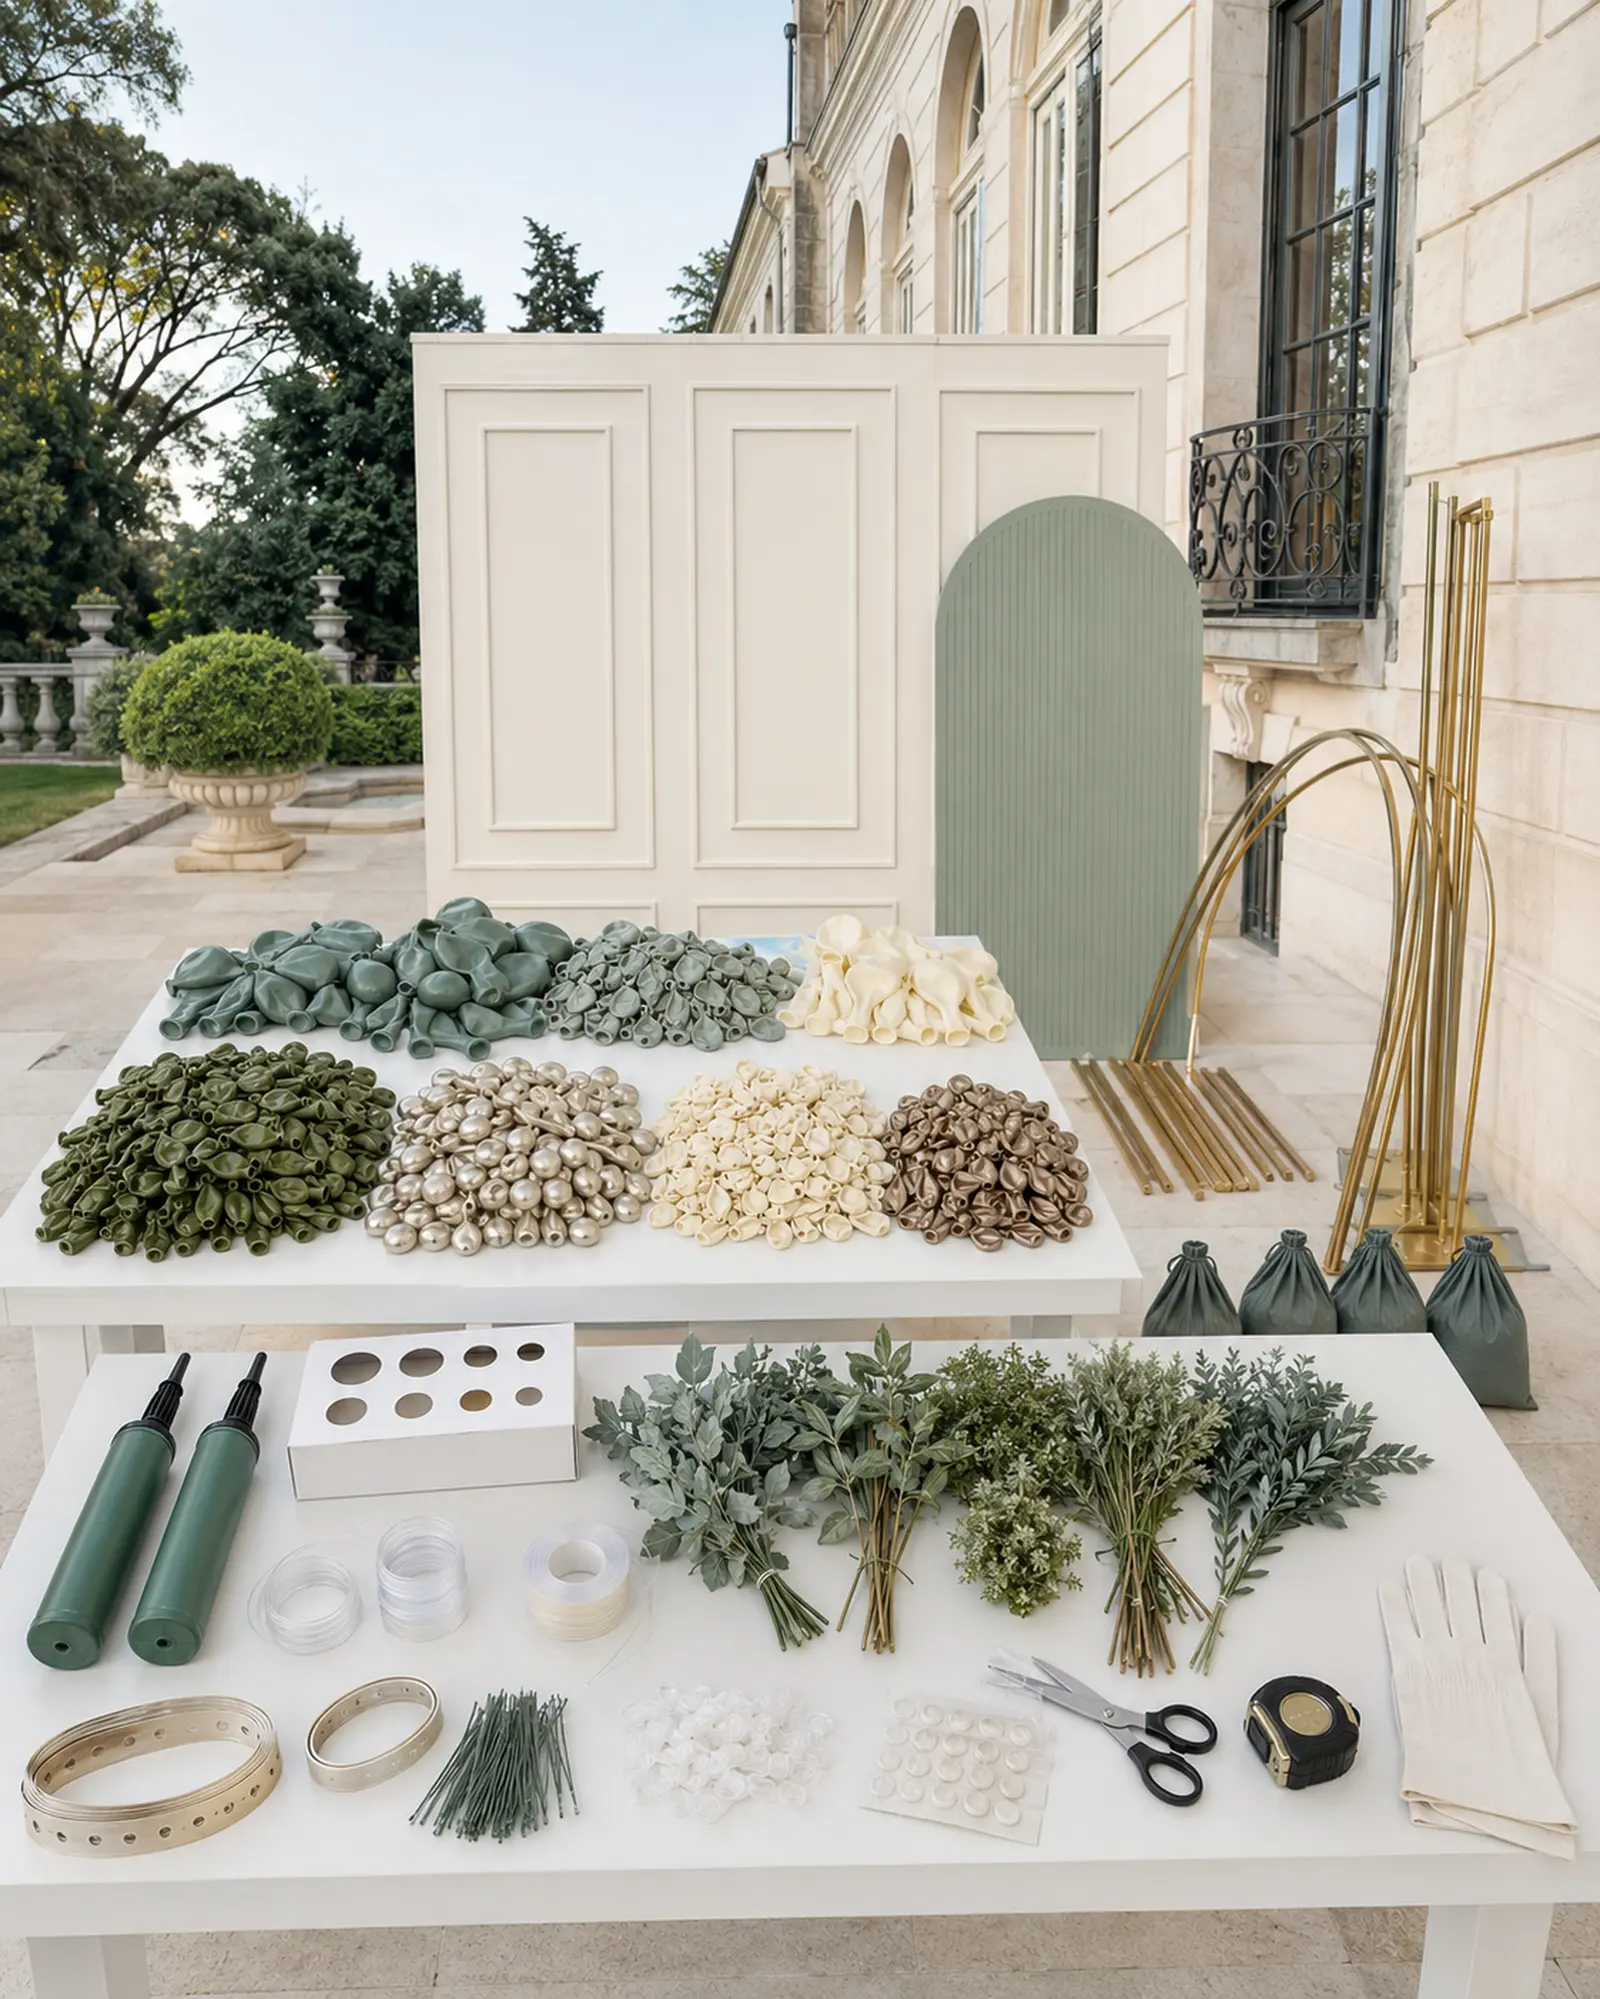
Step 1: Measure and organize
Reserve a footprint at least 10 feet wide by 5 feet deep, plus a 36-inch guest path. Mark the backdrop centerline and the two outer limits of the balloon silhouette. Divide supplies into labeled bins by color and size. Confirm ceiling height, doors, outlets, wind exposure, emergency routes and venue rules before building.
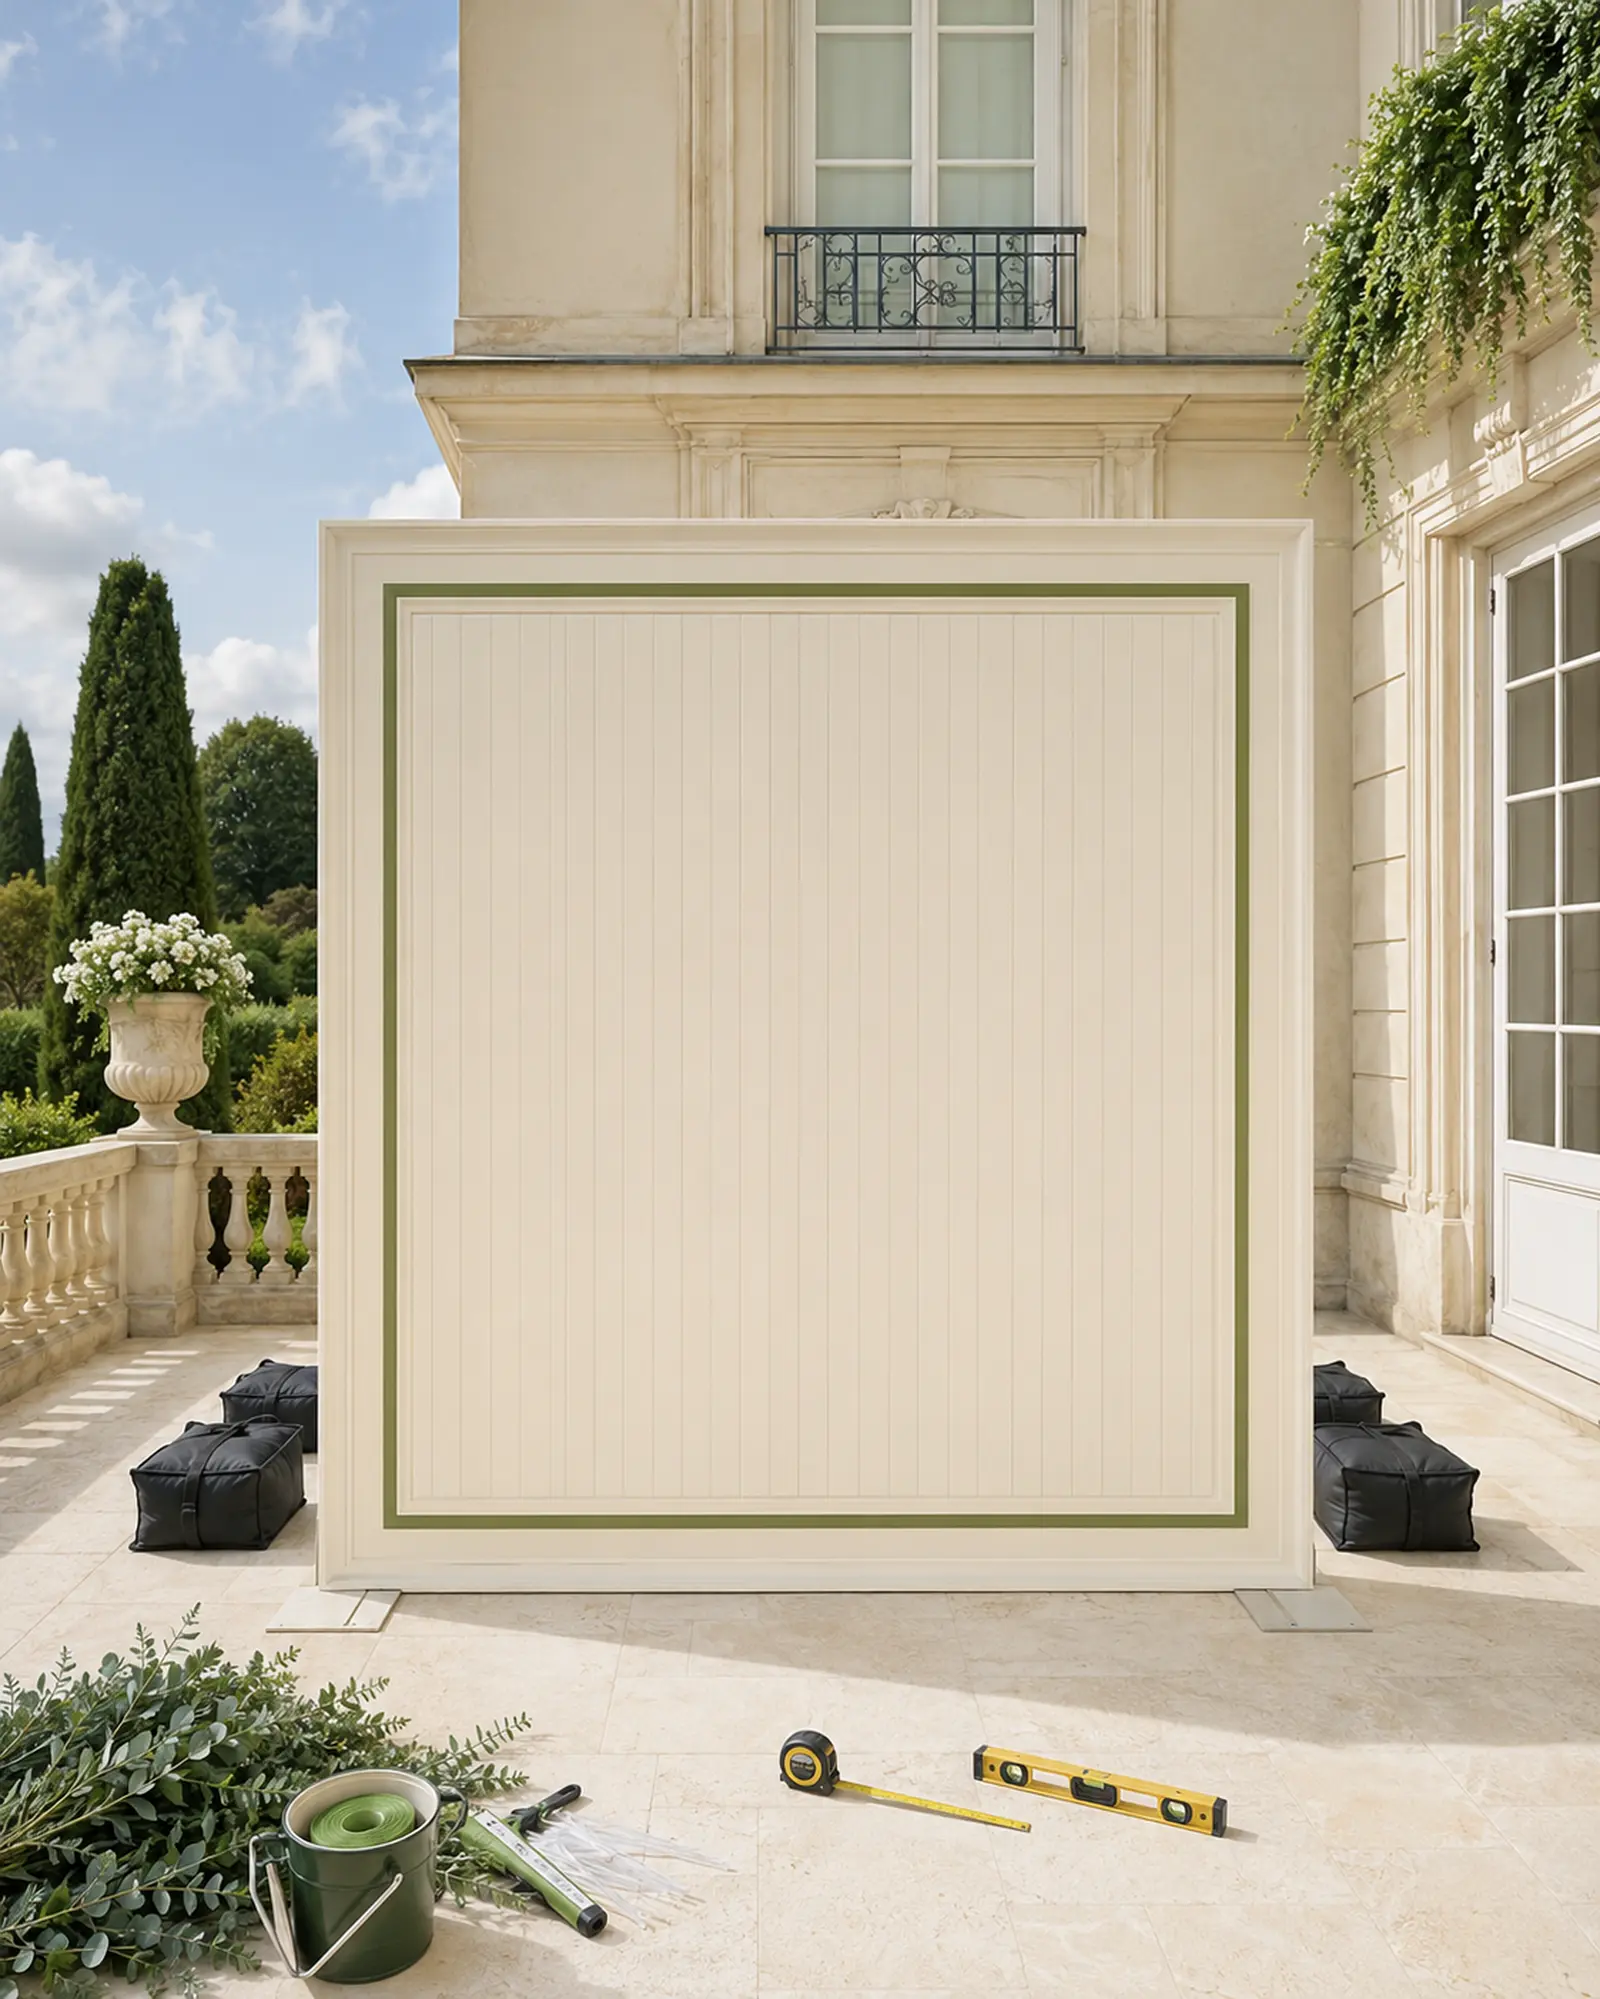
Step 2: Secure the framework
Assemble the wall to its manufacturer’s instructions. Level both uprights, lock hardware and conceal rated ballast behind the panel. Add independent safety ties only to venue-approved anchor points. Push and pull the frame gently from several directions; if it rocks, correct the base before continuing.
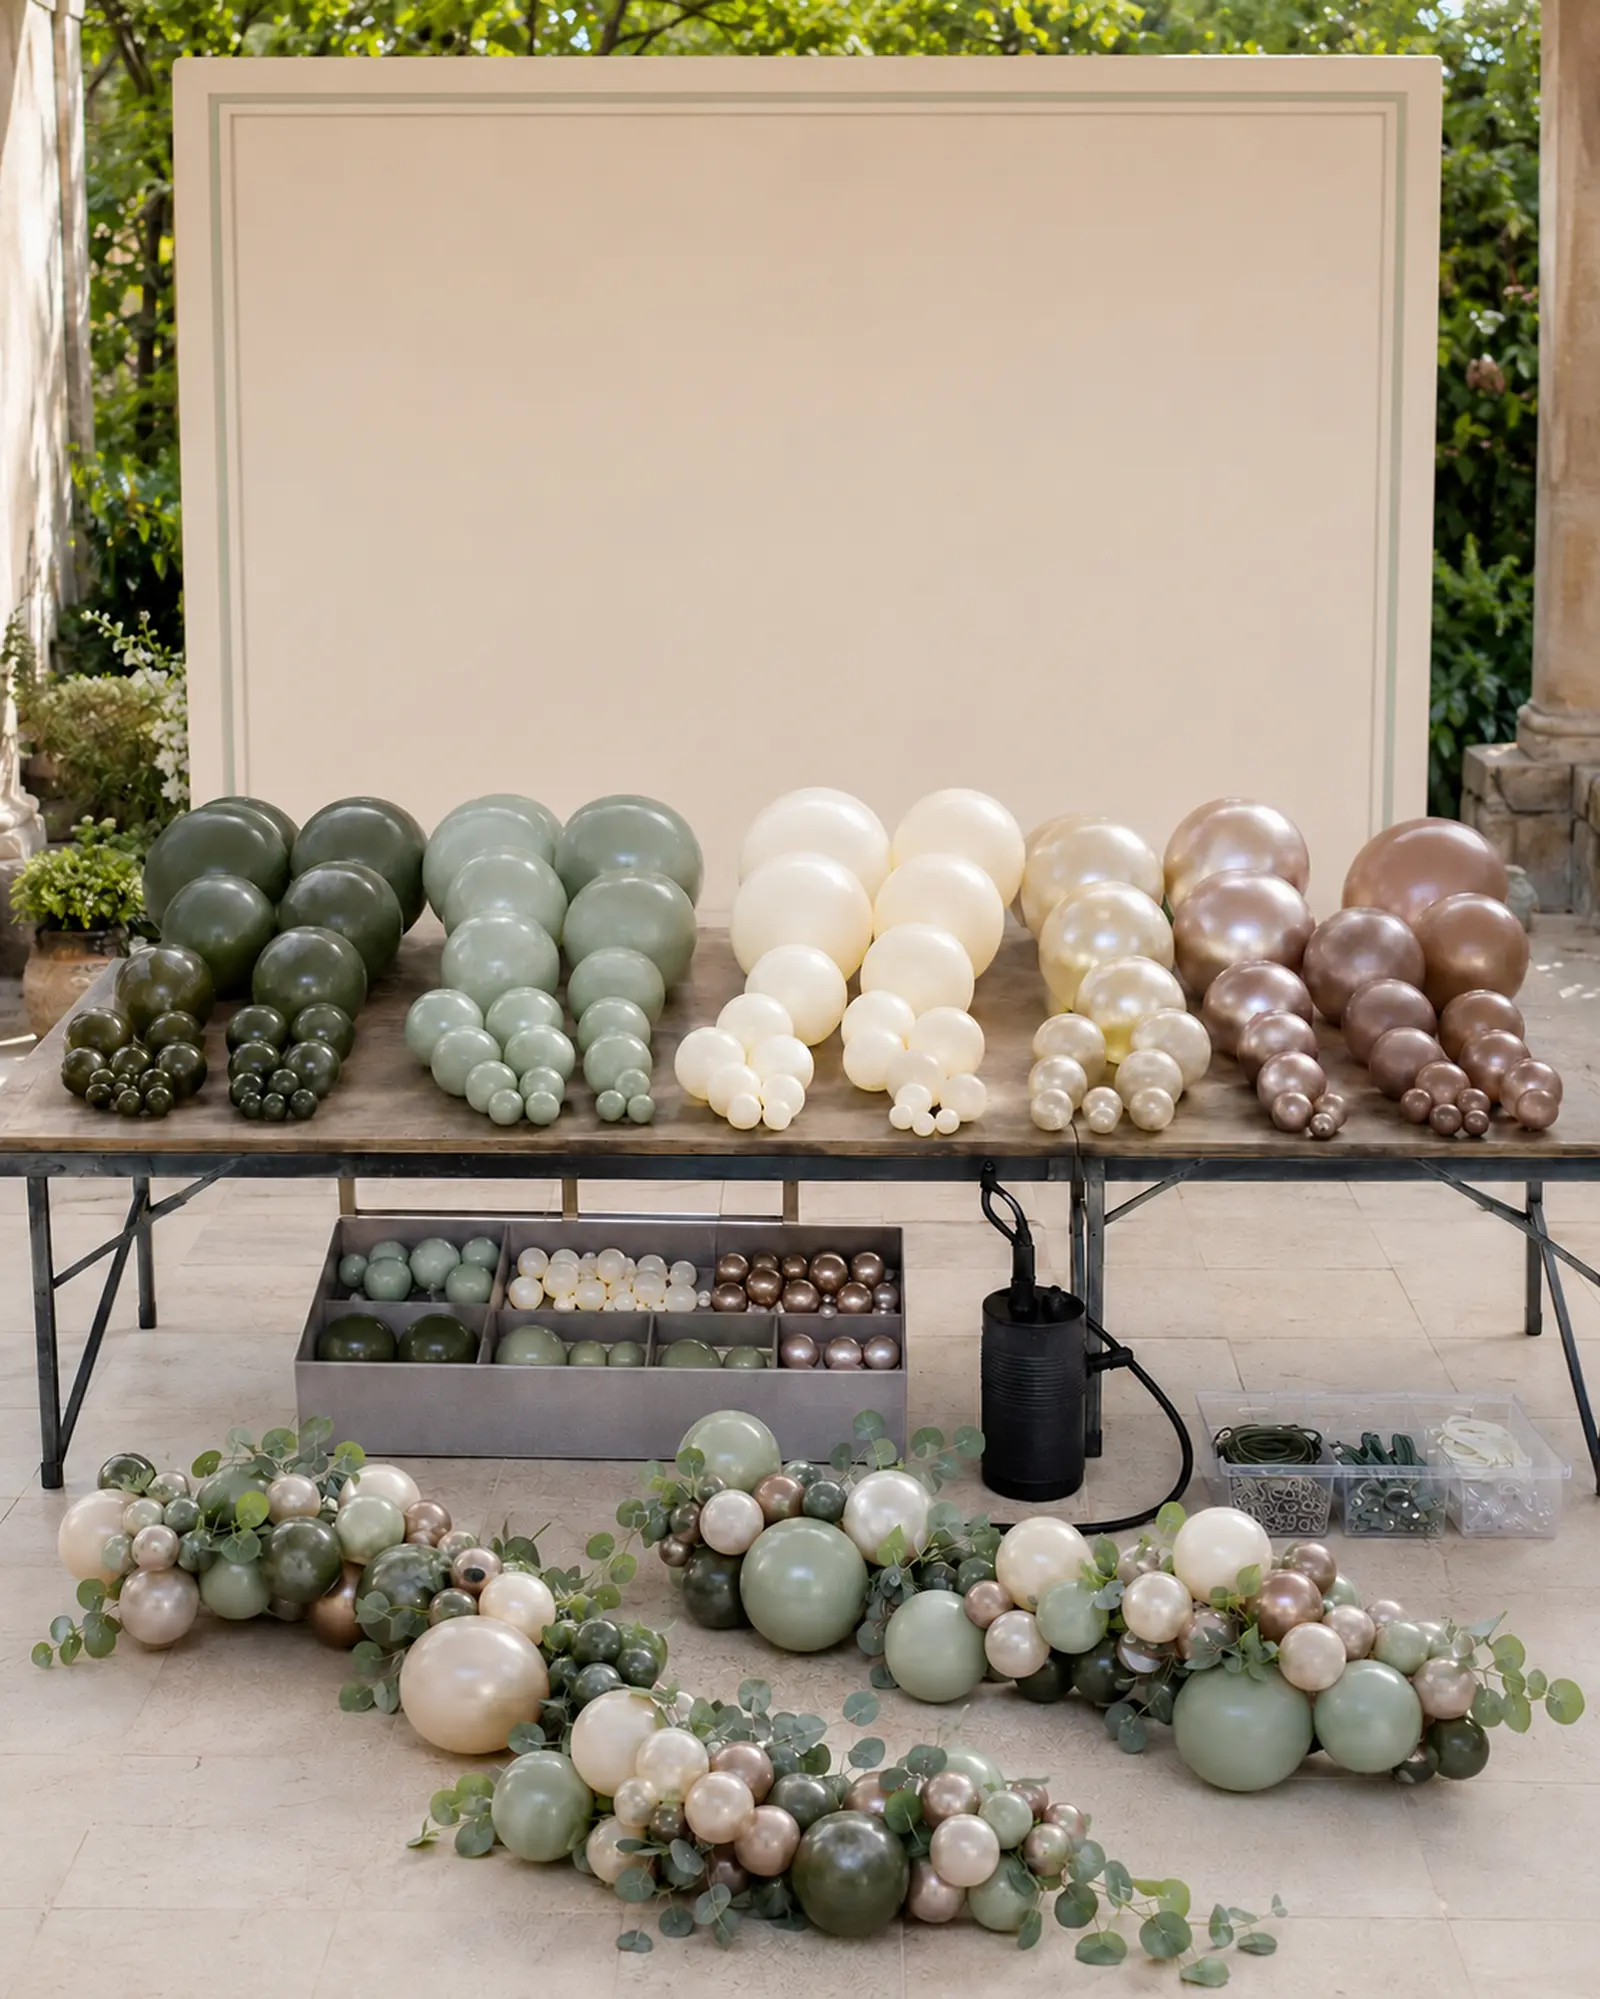
Step 3: Inflate and build sections
Inflate most 11-inch balloons to varied diameters between about 7 and 10 inches, keeping them round rather than pear-shaped. Pair balloons into duplets, twist two duplets into quads, then connect quads into 3-to-5-foot sections. Distribute large balloons unevenly. Build separate left-base, upper-left, top-right and lower-right sections rather than one unmanageable garland.
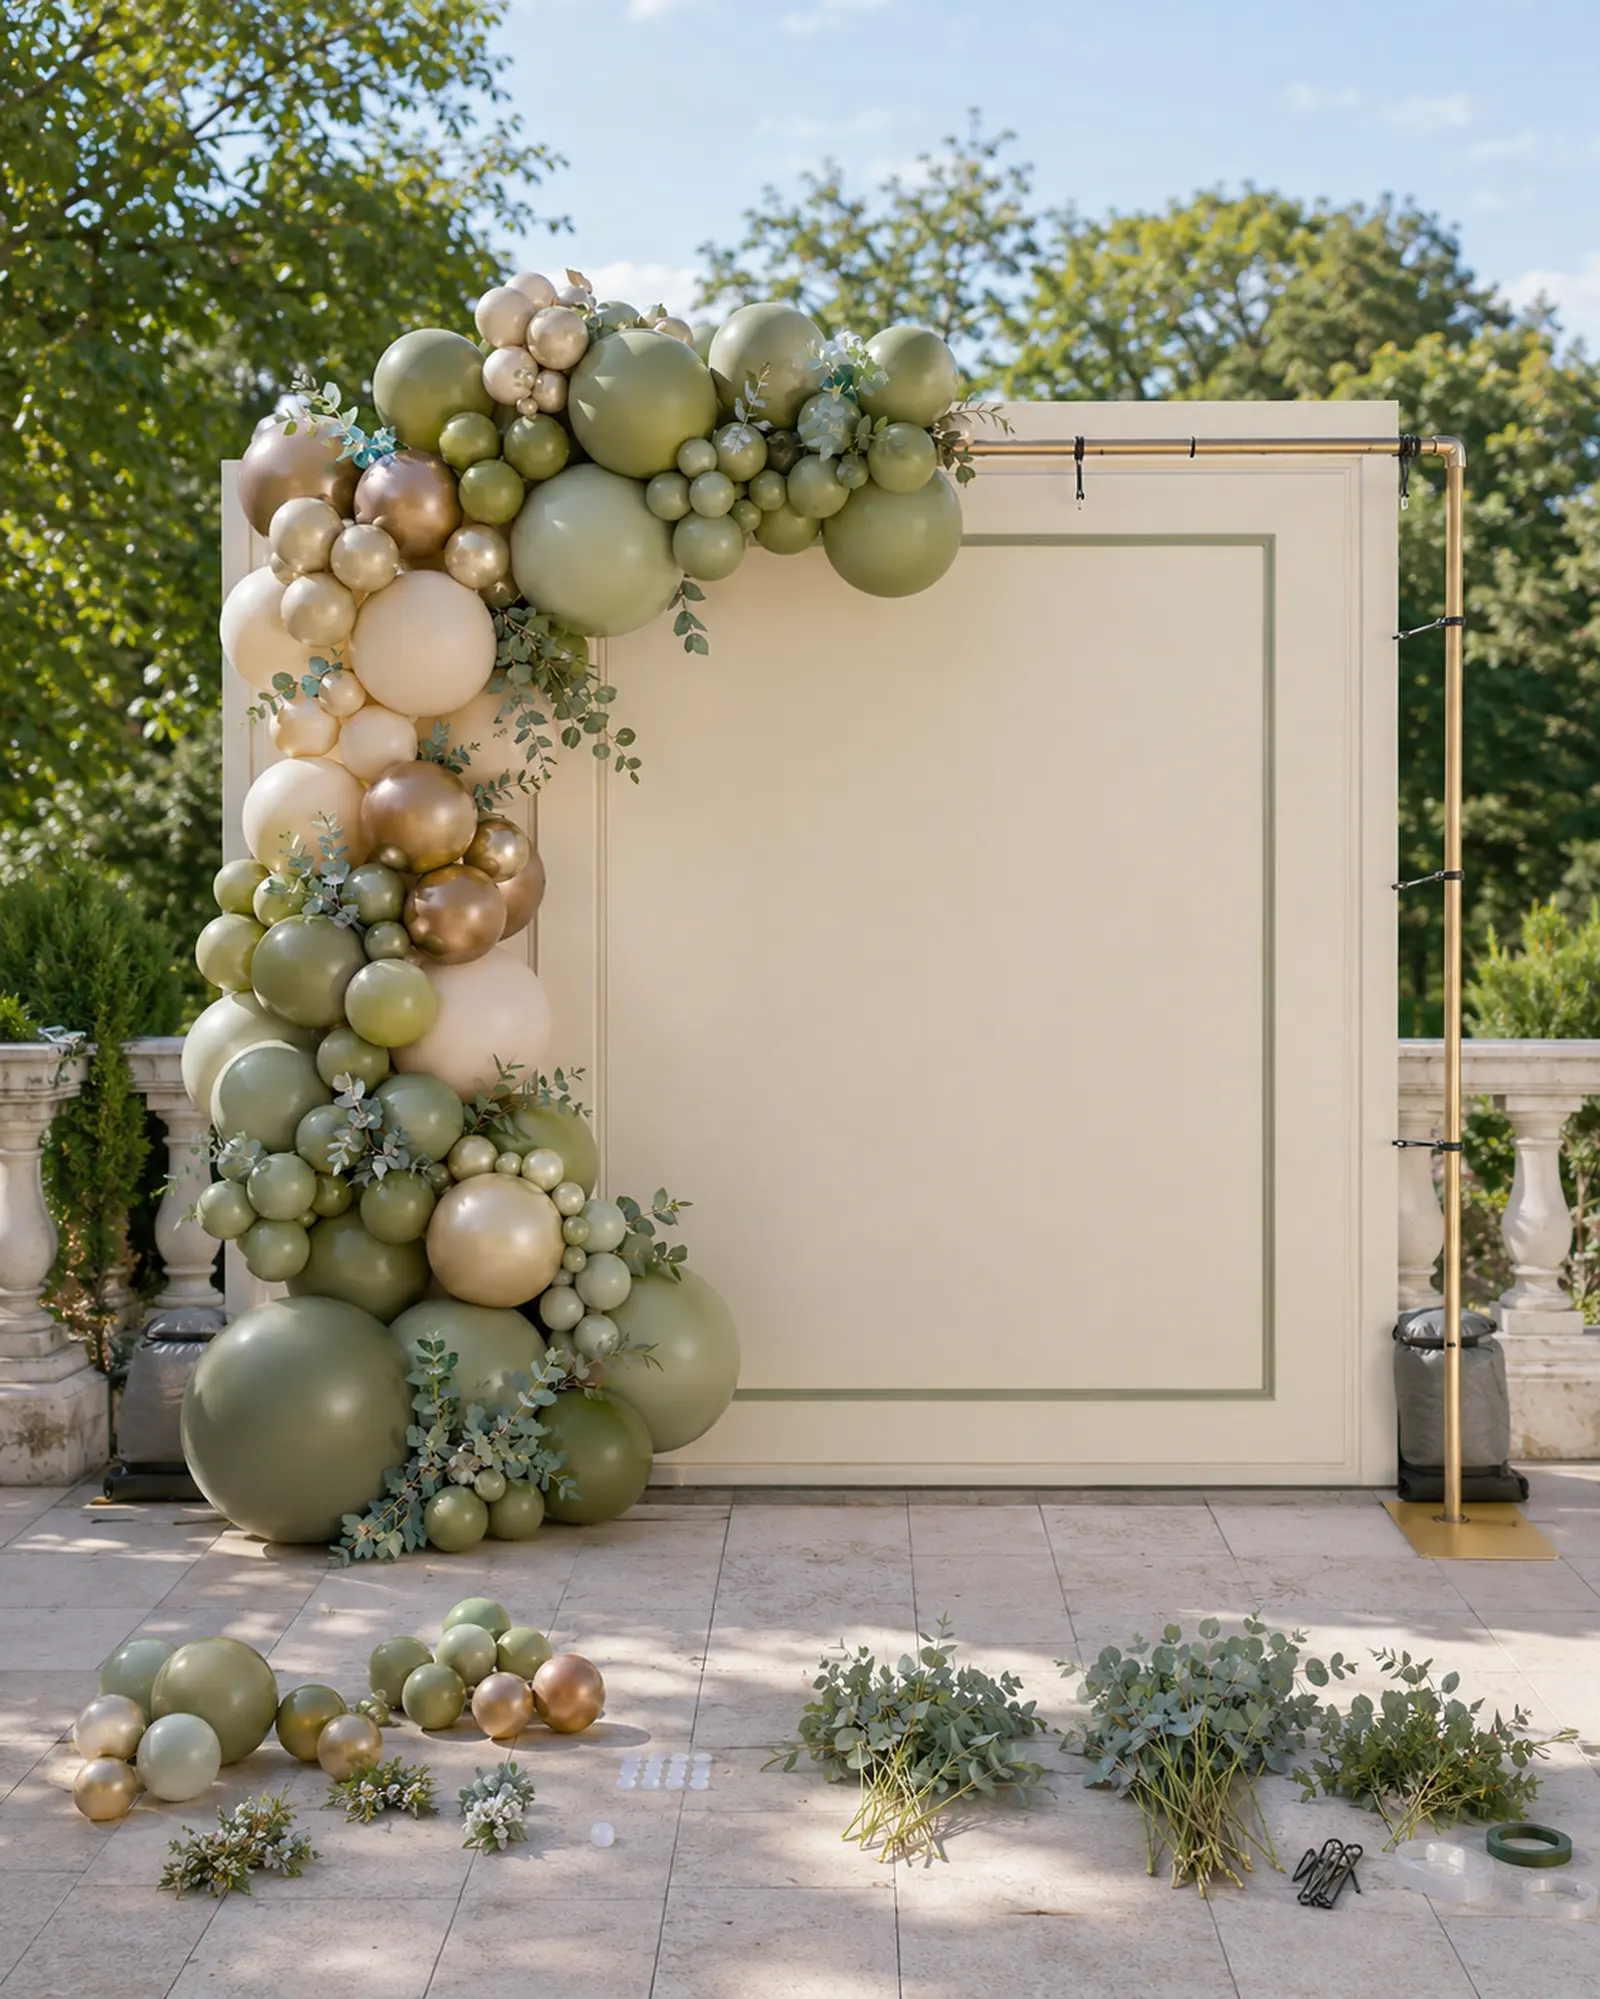
Step 4: Install the silhouette
Anchor the heaviest left-base section low on the frame, then add the upper-left and top sections. Use reusable ties around rated frame members—not around panel trim. Keep the center open for lettering and photographs. Attach the lower-right counterweight cluster last. Step back 12 feet after every section.
Step 5: Fill, refine and add greenery
Use 5-inch clusters to hide mechanics and bridge abrupt size changes. Add deep olive inside the design for depth, ivory along the outer edge for light and metallic accents only at visual turns. Insert greenery into balloon gaps with its own lightweight ties; never use sharp wire against latex. The finished wall should be full at the base and lighter toward the top.
Simple layout map
Left base: 35% of balloon volume, including two largest balloons. Upper-left rise: 25%. Top sweep: 25%, with no 24-inch balloons overhead. Lower-right balance: 15%. Preserve at least a 30-inch open visual center and keep all bases outside the guest path.
Budget, standard and luxury options
- Budget: 6-by-7-foot wall, three colors, about 170–210 balloons, faux greenery and no metallic accents.
- Standard: the full five-color 8-by-8-foot design with 235–305 balloons and selected greenery.
- Luxury: premium balloons, custom panel color, dimensional lettering, fresh-looking botanicals and professional lighting.
Decorators should calculate materials, prep, inflation, installation, travel, rental, strike, assistants, overhead, payment fees and profit separately. Use the Elegant Creators pricing calculator rather than copying a competitor’s package price.
Safety and troubleshooting
- Never block doors, sprinklers, alarms, stairs or the minimum guest path.
- Do not rely on balloon strip or glue dots to secure the installation to the main frame.
- Keep children away from burst balloons, pumps, line and small parts; latex may trigger allergies.
- Do not use this plan outdoors without wind-rated engineering and venue approval.
- Flat silhouette: rotate large balloons outward and add small clusters at intersections.
- Garland sliding: add a second rated tie to the frame, not more glue dots.
- Muddy palette: separate olive and bronze with ivory or pale sage.
Frequently asked questions
How long should assembly take?
For an experienced two-person team, allow roughly 2–3 hours for prep and 2–3 hours onsite. Beginners should build a test section and allow more time.
Can I make it the night before?
Indoor air-filled latex can often be assembled ahead, but temperature, balloon quality and storage conditions matter. Store away from sun, heat and sharp objects.
Can I use helium?
No helium is needed. The design is mechanically attached to a weighted frame.
Where can I find local suppliers?
Browse the vendors list, then verify stock, color lots, policies and delivery dates directly.
Share your palette and progress inside the Elegant Creators community, and save this guide before ordering supplies.