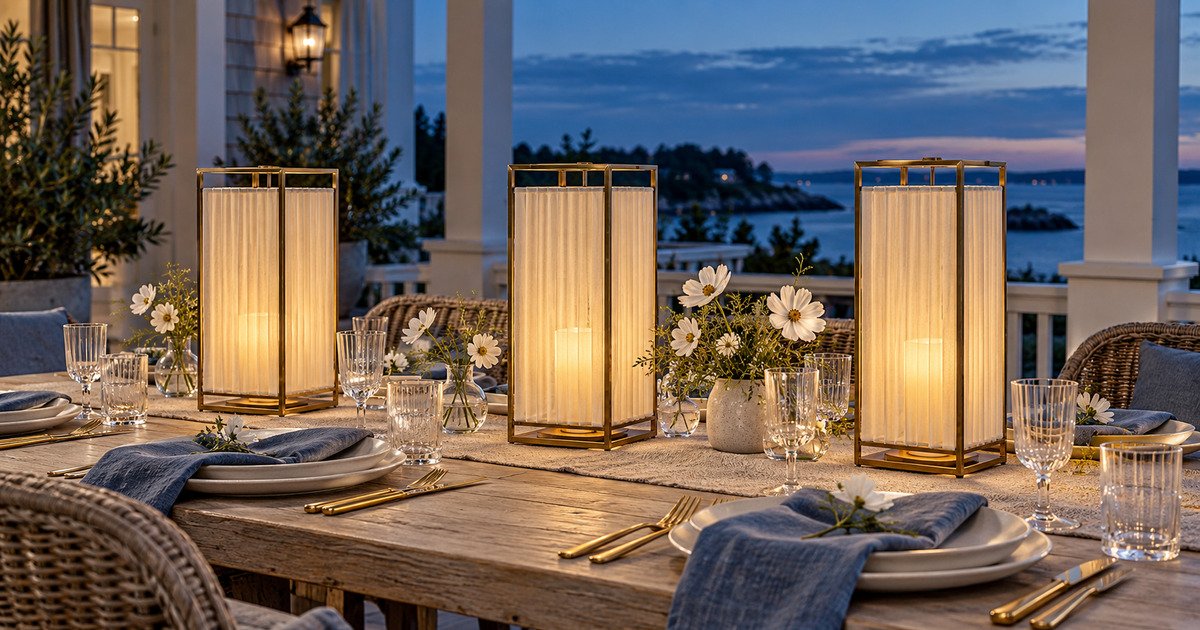
These pleated-linen lanterns turn an ordinary battery candle into a soft, architectural table feature. The removable sleeves are designed for open metal frames, so the same lanterns can be restyled for weddings, porch dinners, holiday tables, and intimate celebrations.
Finished size: approximately 6 × 6 × 14 inches per lantern
Build time: about 60–90 minutes per lantern after cutting a template
Skill level: Beginner to intermediate
Best light source: battery-operated LED pillar candle only
Palette: warm ivory, smoky blue, pale oak, and brushed brass
Supplies and tools
This post contains affiliate links. If you buy through these links, Elegant Creators may earn a commission at no additional cost to you. As an Amazon Associate I earn from qualifying purchases.
Remote-Control Battery LED Pillar Candles
Choose warm-white LED pillars with timers so every lantern can be switched on without reaching inside the sleeve.
Mini Clear Craft Clips
Small clear clips hold the sleeve to the inner frame without permanently gluing fabric to the lantern.
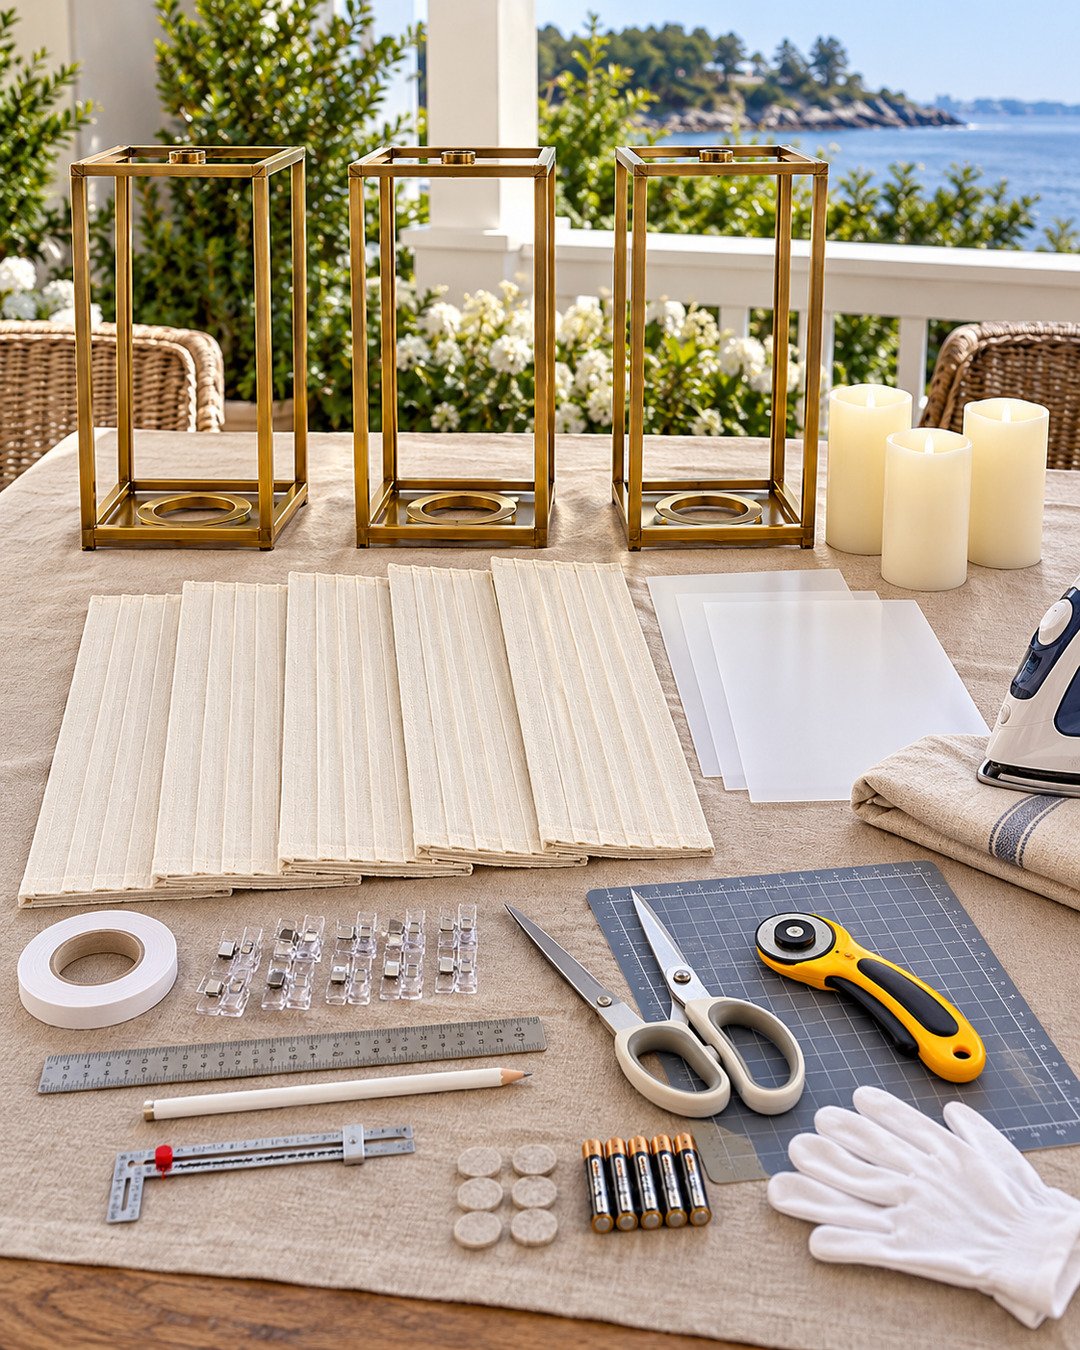
Complete materials list for three lanterns
- Three open rectangular metal lantern frames, approximately 6 × 6 × 14 inches
- Warm-ivory medium-weight linen or linen-look fabric
- Thin translucent diffuser film suitable for cool LED applications
- Three battery-operated LED pillar candles with remote controls
- Mini clear removable clips
- Fabric-safe double-sided tape
- Ruler, fabric pencil, seam gauge, sharp scissors or rotary cutter and mat
- Iron and pressing cloth
- Felt pads for the lantern bases
- Spare batteries and a small storage envelope for clips
Step 1: Measure the inside of the frame
Measure the clear opening inside each lantern side rather than the outside dimensions. Subtract approximately ¼ inch from the width and height so the finished insert does not buckle against the metal. Build one paper template and test it on all three frames because decorative lanterns are not always perfectly identical.
Step 2: Cut the diffuser backing
Cut one backing rectangle for each lantern side you plan to cover. For a softly enclosed look, cover all four sides. For brighter directional light, cover three sides and leave the side facing away from guests open. Keep every insert above the candle base and away from battery compartments or vents.
Step 3: Cut and press the linen
Cut the linen wider than the backing so it can form pleats. A useful starting ratio is about 1.8 to 2 times the finished panel width. Test the iron on a scrap, use a pressing cloth, and follow the fabric manufacturer’s heat guidance.
Step 4: Form consistent accordion pleats
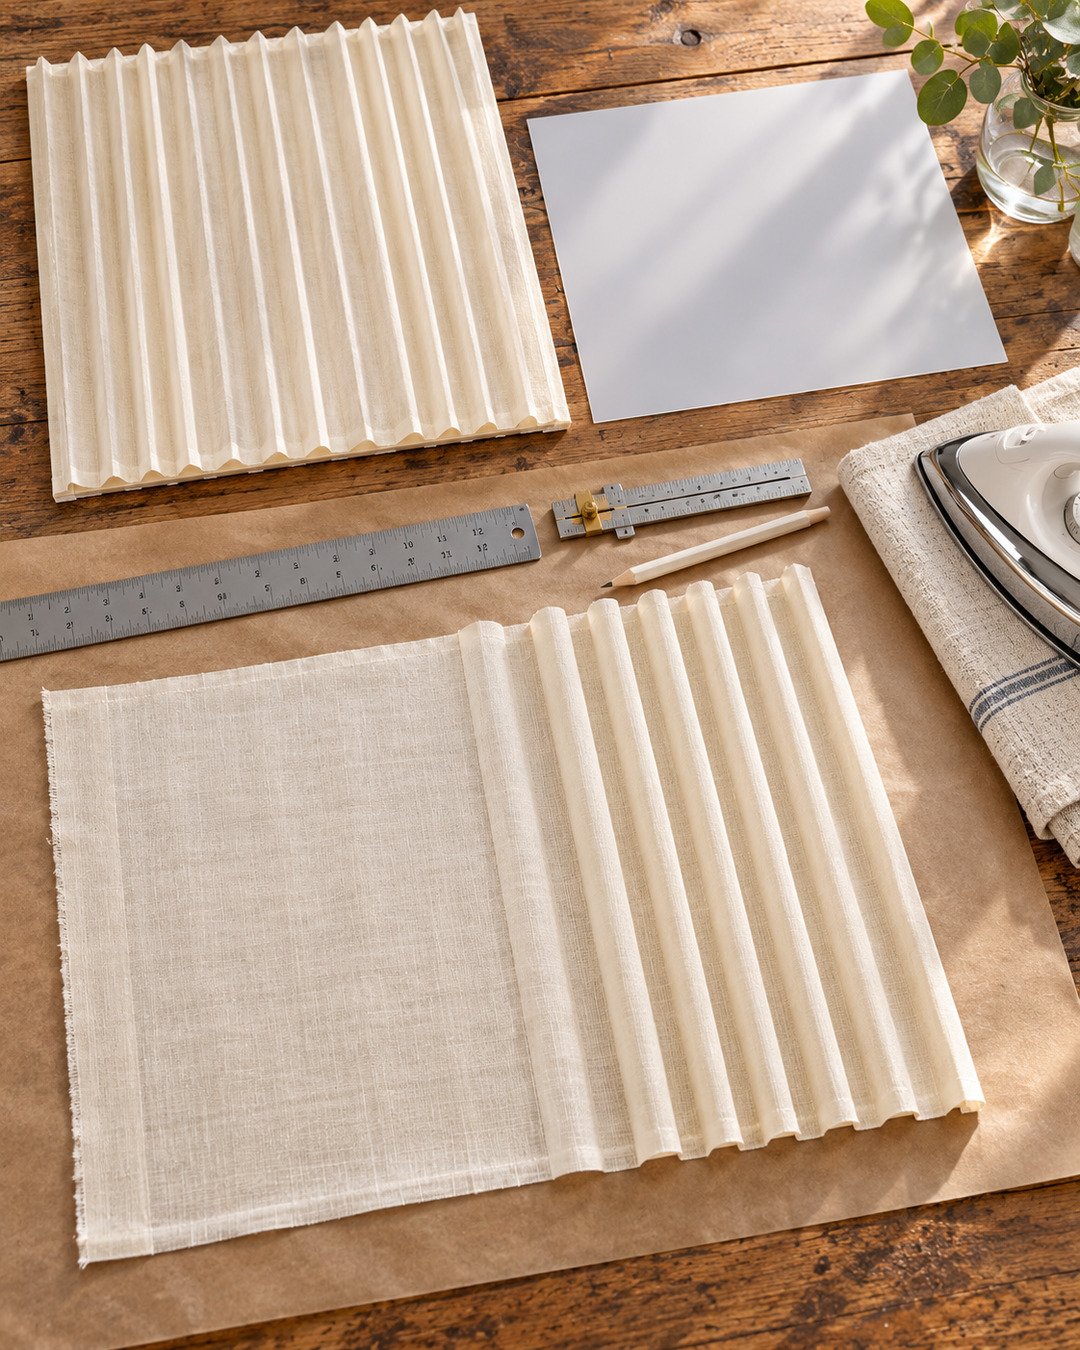
- Mark a light guide every ¾ inch along the top and bottom edges.
- Fold the first line forward and the next line backward.
- Continue the accordion pattern across the full panel.
- Press one section at a time through the pressing cloth.
- Compare the pleated width with the backing before trimming.
Step 5: Mount the linen to the diffuser
Run narrow fabric-safe tape along the top and bottom of the diffuser backing. Center the pleated linen, keeping the folds vertical, then press only the outer edges into place. Do not saturate the fabric with glue; removable construction makes repairs and laundering easier.
Step 6: Attach the panels inside the frame
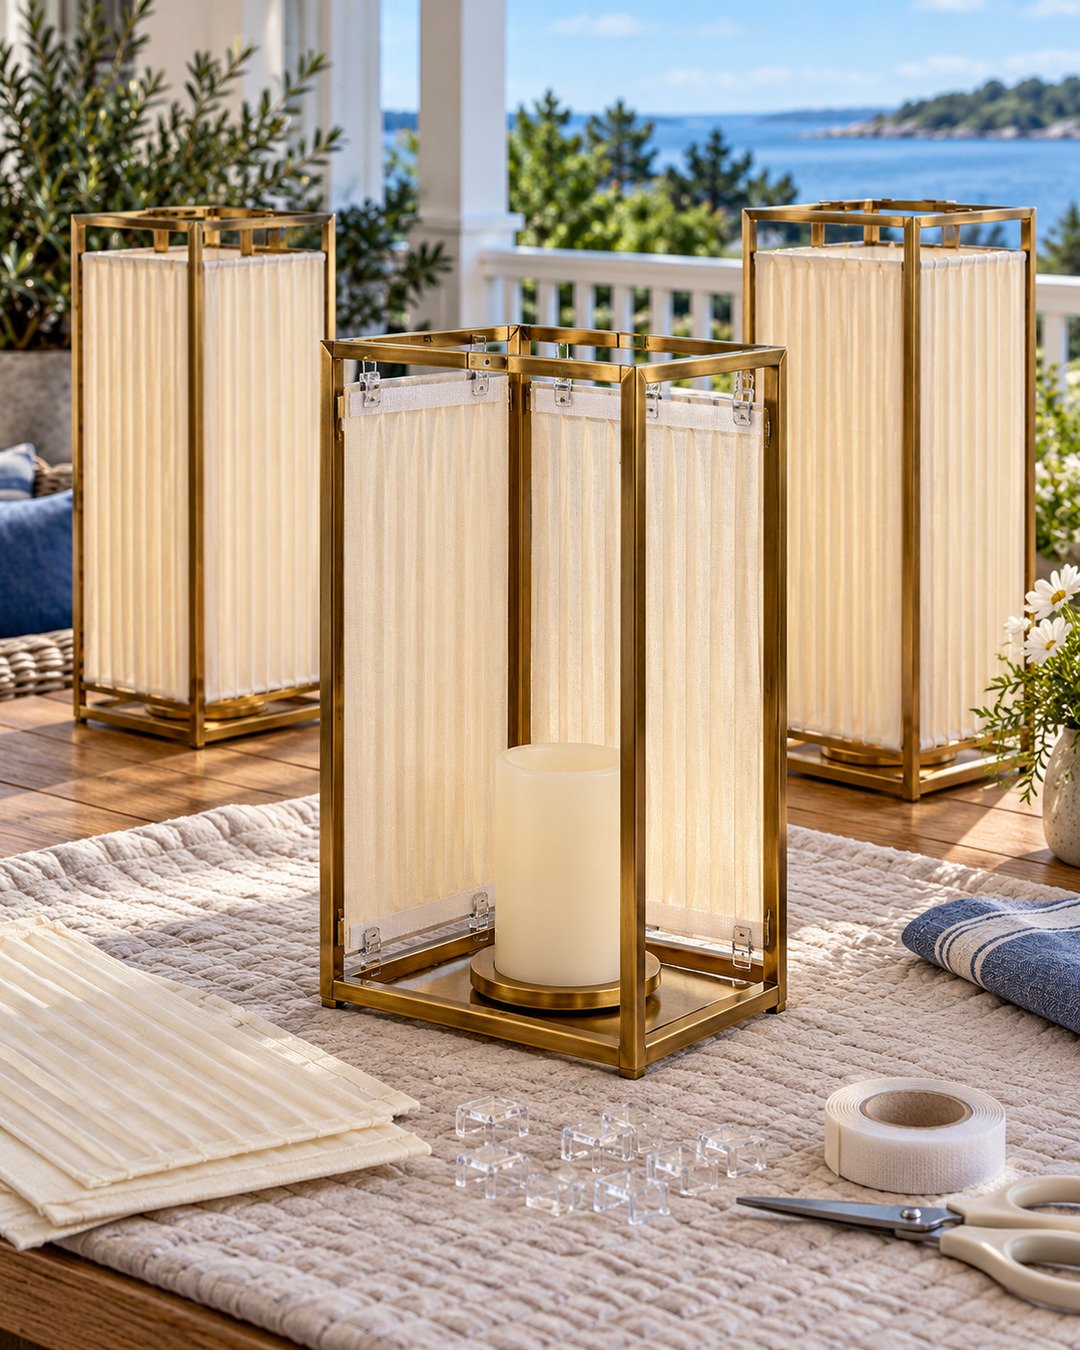
Clip the top edge first, check that the pleats hang straight, then secure the lower edge. Keep clips concealed behind the brass rails. Leave clear space around the LED candle, switch, and battery compartment. Add felt pads beneath the metal base before placing the lantern on wood, glass, or delicate linen.
Step 7: Test the lanterns in the final room
Install fresh batteries and run the lights for at least 30 minutes while monitoring the interior. The system should remain cool because only LED candles are permitted. Test the remote from the service position and confirm that the lanterns do not obstruct guest sightlines or serving paths.
Safety rules
- Never use a real candle, tealight, Sterno, incandescent bulb, or exposed electrical component inside a fabric sleeve.
- Use only cool battery LED candles and follow their manufacturer’s clearance instructions.
- Keep fabric away from battery doors, vents, and switches.
- Do not leave the lanterns operating unattended.
- Use felt pads and venue-approved protection under every metal base.
- For outdoor use, move the lanterns inside if wind, moisture, or condensation is expected.
Optional upgrades
- Replace ivory linen with dusty blue, plum, or moss sleeves for another event.
- Add narrow contrast piping to the linen edges before pleating.
- Use two lantern heights, provided every frame remains stable and guest sightlines stay open.
- Label each sleeve set and store it flat with the matching clips.
Budget guidance
The reusable frames and LED candles are the foundation investment. Save by making several interchangeable sleeve sets rather than buying new lanterns for each palette. Linen remnants can work when every panel comes from the same dye lot and the weave is consistent. Do not reduce costs by substituting real flame or unstable frames.
Troubleshooting
The pleats spread open
Increase pressing time within the fabric’s safe heat range and add narrow attachment points at both the top and bottom of the diffuser.
The panel bows inward
Trim the backing slightly narrower or reduce the number of pleats. The insert should sit inside the opening without pressure.
The light looks spotty
Use one continuous diffuser layer and center the LED candle. Avoid very sheer fabric without backing.
The clips are visible
Move them behind the vertical brass rails and choose smaller clear clips with a firm grip.
Frequently asked questions
Can I use glass lanterns?
Only if the glass panels are removable and the new inserts can be installed without damaging the frame. Never trap fabric against a heat-producing light source.
Can the sleeves be washed?
Test the fabric first. Remove every clip and diffuser backing, then follow the fabric manufacturer’s care instructions. Re-press the pleats afterward.
How many lanterns should I use?
For an 8-foot table, three lanterns create an intentional rhythm. Use one or two on smaller tables and preserve serving space.
Final finishing checklist
- All frames are stable and padded underneath
- Pleats are vertical, even, and trimmed cleanly
- Panels are removable and securely clipped
- Only battery LED candles are installed
- Battery doors, switches, and vents remain accessible
- Remote controls and spare batteries are labeled
- Lanterns remain clear of guest elbows and serving paths
- The 30-minute safety test is complete
Price custom décor with confidence
Planning to offer these lanterns as a reusable rental upgrade? Use the Elegant Creators Profit Calculator to account for materials, labor, delivery, setup, and profit.


Join the conversation
What do you think?
Share your thoughts, questions or experience with this design. We would love to hear from you.