Affiliate disclosure: This article may contain affiliate links. As an Amazon Associate I earn from qualifying purchases, at no additional cost to you.
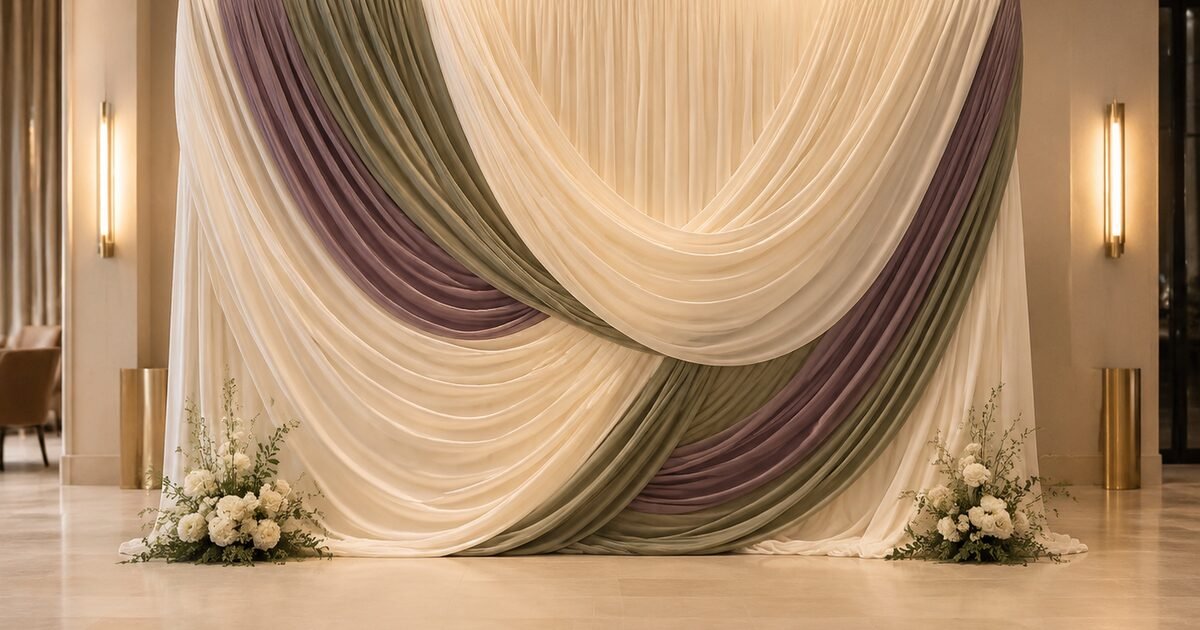
A beautiful draped backdrop should look fluid, but it should never feel improvised. This sculptural wedding photo wall uses measured anchor points, generous fabric and a properly weighted freestanding frame to create broad ivory, sage and muted-plum waves. The result feels architectural, photographs beautifully and can be installed without fastening anything to a venue wall or ceiling.
Finished size and layout
- Finished backdrop: approximately 10 feet wide × 8 feet high
- Frame clearance: 12–16 inches from the venue wall
- Guest route: at least 36 inches of clear walking space; maintain more where local or venue rules require it
- Photo zone: approximately 7 feet wide in the center
- Build time: 2–3 hours after steaming and labeling the fabric
- Recommended crew: two adults for assembly and styling
Materials and tools
Confirm every frame rating and venue rule before purchasing. Product availability changes, so use the links to check the current listing details.
Heavy-duty adjustable backdrop stand
A 10-foot-wide stand rated for the combined fabric load. Use only within the manufacturer’s height, width and weight limits.
Ivory chiffon backdrop panels
Start with a full ivory base layer, then add separate decorative panels for the wave folds. Verify dimensions and flame-retardancy requirements with your venue.
Large spring clamps
Use padded or plastic clamps to establish temporary anchor points. Keep every clamp behind the fabric and out of guest reach.
Backdrop sandbag weights
Ballast both bases according to the stand manufacturer’s instructions. Empty fillable bags must be filled and securely closed before installation.
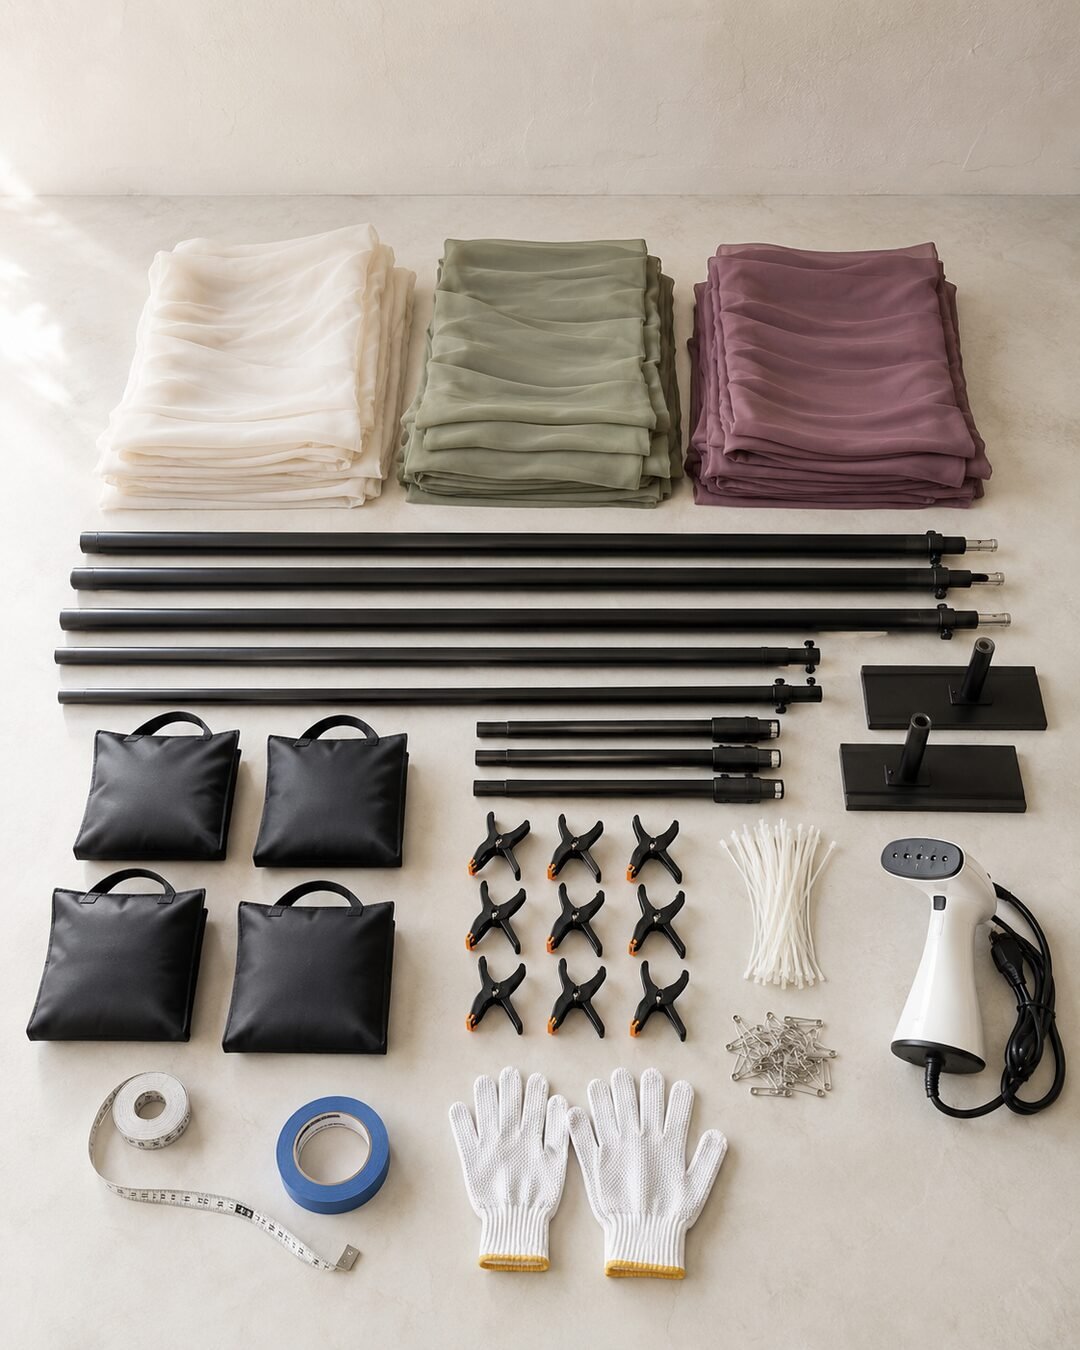
You will also need two or three ivory chiffon panels, one sage panel, one muted-plum panel, a garment steamer, tape measure, painter’s tape, fabric-safe safety pins, white cable ties, scissors and work gloves. For venue-approved fire-retardant drape, frame rentals or an installation crew, use the Elegant Creators Vendors List.
Step 1: Measure the room before opening the frame
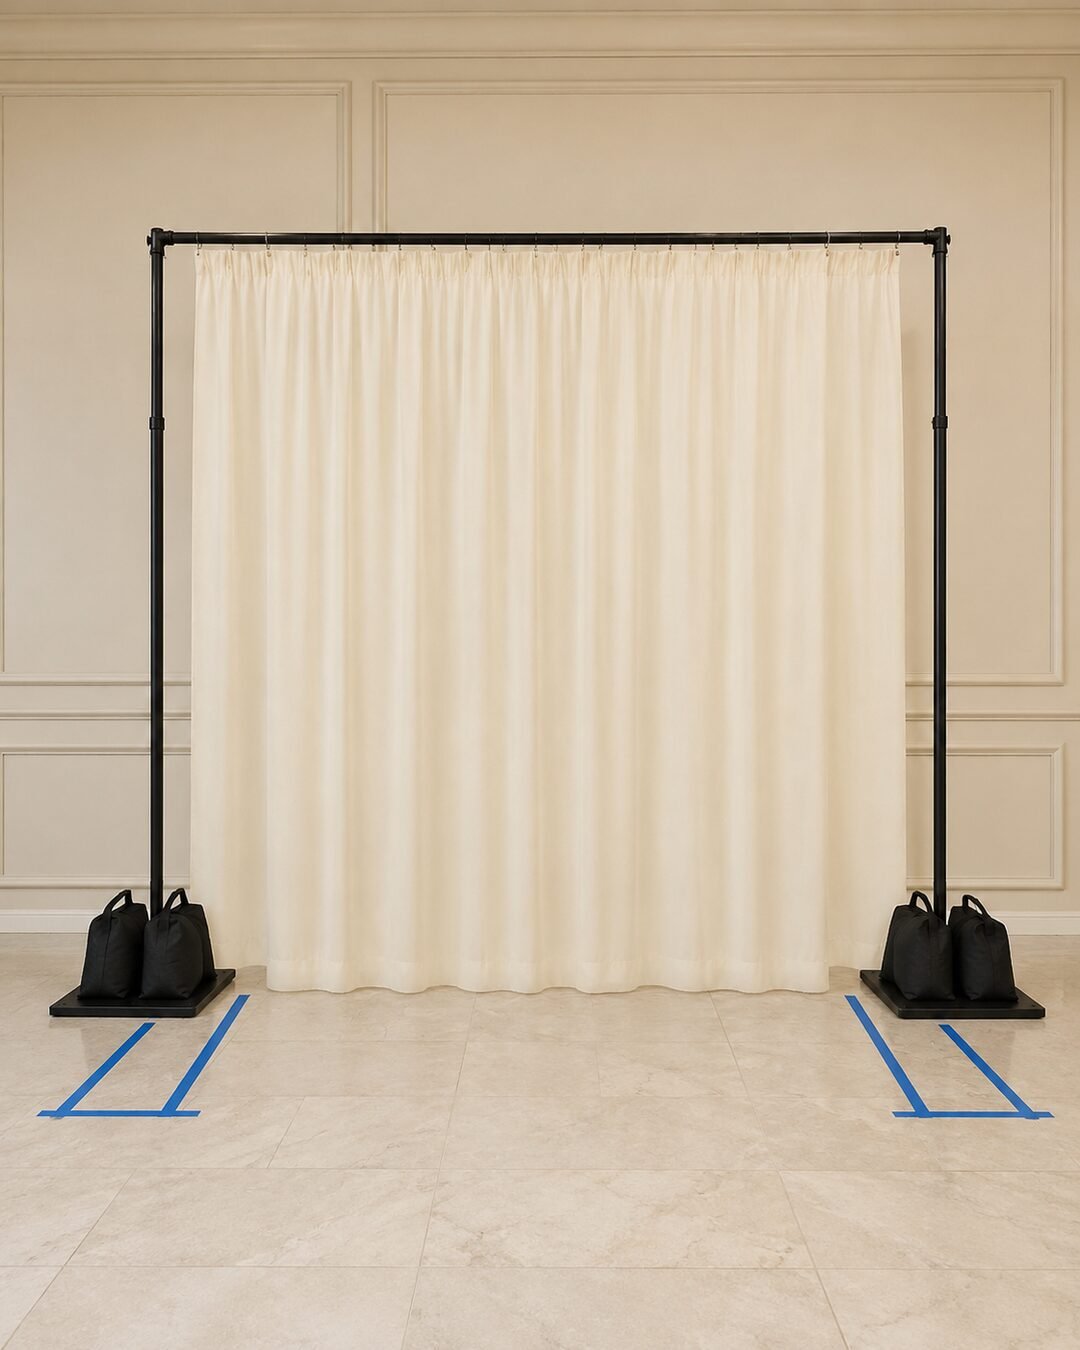
Mark a 10-foot-wide footprint with painter’s tape, then measure the height at the exact installation point. Keep the frame 12–16 inches forward from the wall so fabric can fall naturally without rubbing wall sconces, outlets or trim. Confirm that the finished placement does not narrow an exit or block service traffic.
Mark the centerline and a 7-foot-wide photo zone. The decorative folds should frame that zone rather than filling it. If the room is smaller, reduce the design to 8 feet wide and shorten each drape panel proportionally.
Step 2: Assemble and ballast the empty structure
Build the stand at a comfortable working height first. Lock every telescoping section, then raise it with one person at each upright. Add the manufacturer-specified ballast before attaching decorative fabric. The base feet should sit flat, and the crossbar must remain level.
Attach the ivory base curtains across the top bar and distribute the gathers evenly. The bottom edge may just kiss the floor, but it should not form a deep pile where guests can step on it.
Step 3: Prepare the wave panels
Steam each decorative panel off the floor. Label the top-left corner with removable tape so the planned direction stays consistent. For a 10-foot-wide frame, use panels approximately 10–12 feet long; extra length creates a relaxed curve, while a panel that barely spans the frame will pull into a tight smile shape.
Accordion-fold each panel into soft 3–4 inch pleats. Do not twist the fabric into a rope. Broad, parallel folds reflect light evenly and make inexpensive chiffon look more polished.
Step 4: Establish the first two anchor points
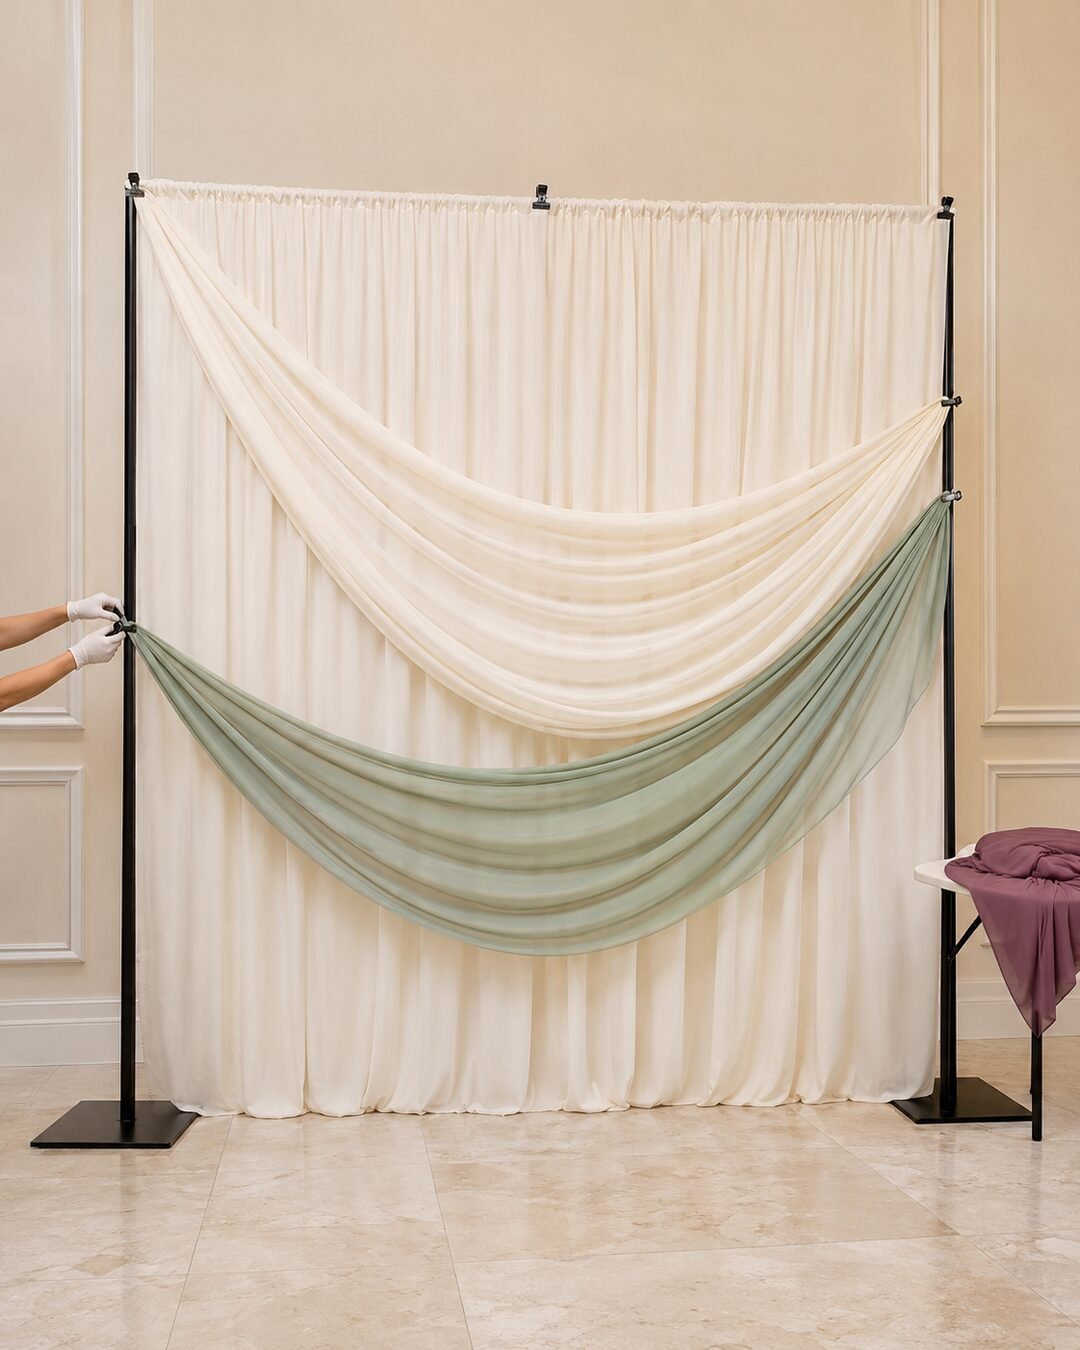
Begin with an ivory decorative panel. Clamp its first end near the upper-left corner and its second end at the mid-right upright. Allow the center to drop naturally, then lift it until the lowest point sits around 42–48 inches from the floor. Hide the clamps behind the base curtain or under a folded return.
Add the sage panel in the opposite direction: start near the lower-left third and finish near the upper-right third. Maintain at least 24 inches of clear ivory background in the central portrait area.
Step 5: Add the plum accent and refine the S-curve
Place muted plum behind one ivory sweep and in front of part of the sage layer. It should read as an accent, not a solid stripe. Step back at least 12 feet after every adjustment. From that distance, check that the folds form one continuous visual path rather than several unrelated swags.
Use hidden fabric-safe pins only within doubled fabric, never through a single stretched layer. Trim or tuck cable-tie tails and cover every hard edge. Nothing sharp should face the photo zone.
Step 6: Conceal mechanics and finish the base
Wrap small fabric returns around the uprights, leaving access to every locking knob and ballast point. Add restrained floral clusters at the two lower corners only after the structure has passed its stability check. Keep stems and mechanics inside reusable cages; never tie a heavy arrangement to unsupported chiffon.
Step 7: Light and inspect the finished backdrop
Use soft front lighting from both sides of the photo zone. Side light alone exaggerates wrinkles, while a direct spotlight can make chiffon transparent. Take test photographs at standing and seated height, then complete a final walk-around: verify locked hardware, stable bases, concealed cords, clear exits and fabric that cannot be pulled by guests.
Troubleshooting
The folds look like ordinary party swags
Increase the difference between the anchor heights and let one panel cross another. The sculptural effect comes from overlapping diagonal movement, not several identical U-shapes.
The fabric looks thin
Add fullness to the ivory base layer and keep the decorative panels folded rather than stretched flat. Do not solve transparency by piling fabric over lights or electrical equipment.
The frame leans forward
Stop immediately and remove the decorative load. Re-level the feet, reduce the crossbar span if required, check every lock and follow the manufacturer’s ballast instructions. Never hide an unstable structure behind more fabric.
The colors compete in photographs
Make ivory approximately 60–70 percent of the visible surface, sage 20–25 percent and plum 10–15 percent. Keep the strongest plum section away from guests’ faces.
Budget and pricing guidance
Plan separately for frame rental or purchase, fabric, steaming, ballast, floral accents, transport, installation and strike. A reusable professional frame and venue-compliant drape cost more initially but can serve many events. Before quoting a client, include preparation and on-site adjustment time—not only the visible installation hours.
For specialty drape, rentals and insured installers, explore the Elegant Creators Vendors List. Share your scaled plan and palette with the Elegant Creators community before ordering custom fabric.
Frequently asked questions
Can I attach the fabric directly to a venue wall?
Only with written venue approval and a method rated for the wall finish and total load. A freestanding, properly ballasted structure is easier to inspect and does not depend on unknown paint, plaster or trim.
Does event drape need to be flame retardant?
Many venues and jurisdictions require flame-retardant or certified fabric. Ask the venue what documentation it accepts before purchasing, and keep certificates available for inspection. Never assume ordinary retail chiffon satisfies local requirements.
Can one person build this?
Fabric preparation can be done alone, but two adults should raise, position and adjust a 10-foot freestanding frame. Follow the equipment manufacturer’s crew and assembly instructions.
How can I reuse the design?
Change only the accent panels and floral corners. An ivory base can support terracotta and blush for autumn, black and champagne for a gala, or dusty blue and silver for an anniversary.
Keep creating with Elegant Creators
Save your measurements, photograph the empty weighted frame and get feedback before the event. The best draping looks effortless because its structure, safety and proportions were resolved first.
Join the conversation
What do you think?
Share your thoughts, questions or experience with this design. We would love to hear from you.