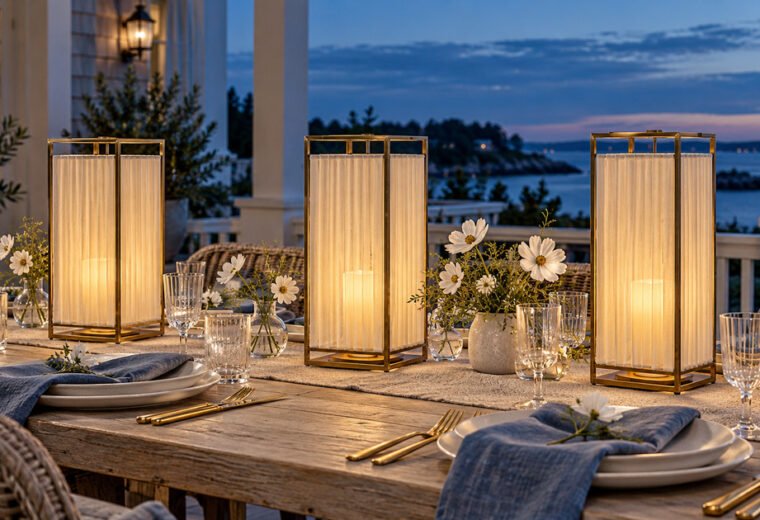
These freestanding pleated-linen lanterns create a soft architectural glow along a ceremony aisle without open flame or ceiling installation. Each sculptural shade wraps a lightweight frame around a warm LED candle, producing a refined column of light that feels equally at home in a gallery, ballroom, greenhouse, or modern chapel.
The tutorial below makes eight lanterns in three heights. Allow 4 to 6 hours for cutting, pleating, frame assembly, and testing. Build the lanterns before event day, then position and switch them on after the aisle is fully dressed.
Project Overview
- Quantity: eight lanterns, four per side
- Finished heights: approximately 18, 24, and 30 inches
- Shade diameter: 10 to 14 inches
- Build time: 4 to 6 hours for two people
- Light source: battery-operated warm-white LEDs only
- Best setting: indoor or fully sheltered venues
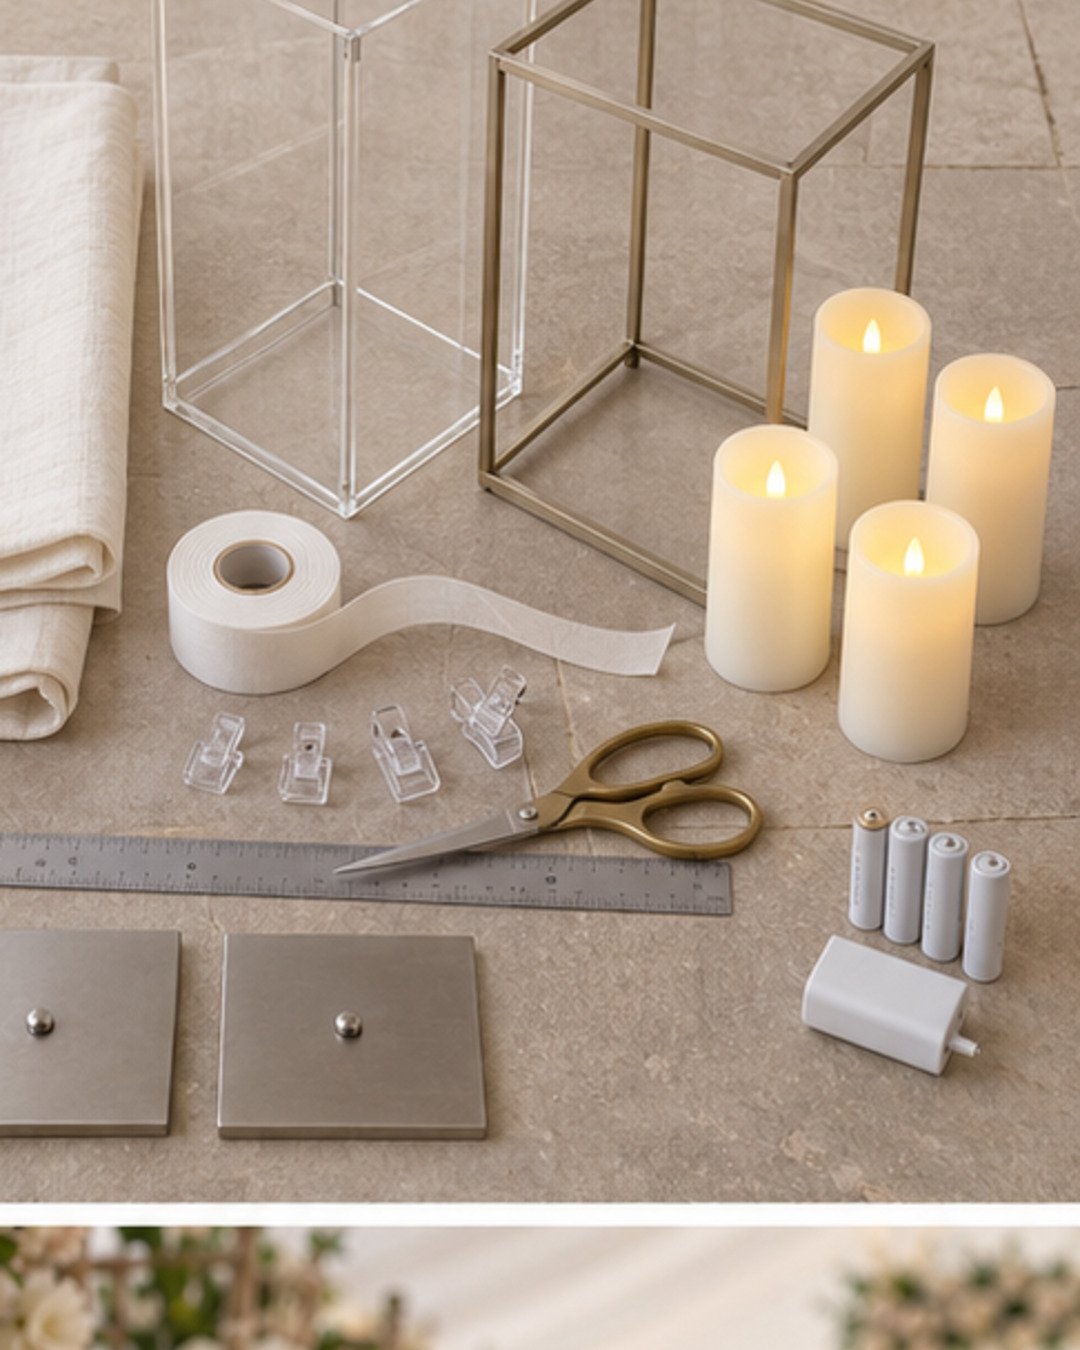
Supplies and Tools
As an Amazon Associate I earn from qualifying purchases.
ESSENTIAL SUPPLY
Battery-Operated Flameless Pillar Candles
Choose warm-white LED pillars with timers or remotes. Battery lighting gives the linen a candlelit glow while avoiding heat and exposed flame.
ESSENTIAL MATERIAL
Lightweight Ivory Linen Fabric
Use a translucent linen or linen-look fabric with enough body to hold crisp pleats. Test a sample over the LED before cutting every panel.
ESSENTIAL TOOL
Fabric Clips and Removable Fasteners
Clips hold the pleats while you test spacing and let you open the shade later to replace batteries. Avoid permanent adhesive until the proportions are confirmed.
CUSTOM SOURCING
Need Frames Made to Your Measurements?
For custom rings, finished lantern rentals, or professional venue installation, browse trusted event businesses through the Elegant Creators Vendors List.
Cut List for Eight Lanterns
Cut two fabric panels for each finished shade, allowing a 1-inch overlap at the back. For a 12-inch-diameter frame, begin with a panel about 40 inches wide. Add 25 to 35 percent more width for pleating. Cut the panel 2 inches taller than the frame so the top and bottom edges can turn inward cleanly.
- Two 18-inch frames
- Four 24-inch frames
- Two 30-inch frames
- Eight removable inner light platforms
- Eight to twelve yards of linen, depending on width and pleat depth
- Eight LED pillar candles plus fresh batteries
Step-by-Step Build
1. Make One Full Prototype
Before cutting all the linen, complete one 24-inch lantern. Place the chosen LED inside the frame and drape a fabric sample around it. Check the glow from the ceremony viewing distance. If the candle appears as a harsh bright dot, use a more opaque fabric or add a second inner diffusion layer that stays well away from the light.
2. Prepare the Frames
Use lightweight, stable cylinder frames with a top and bottom ring plus vertical supports. Paint visible metal ivory, champagne, or matte white if necessary. Add a flat removable platform 3 to 5 inches above the base so the LED sits centered and can be reached without dismantling the lantern.
3. Mark and Form the Pleats
Press the linen first. Mark evenly spaced 1-inch pleats along the top edge with removable tailor’s chalk. Pinch each fold and secure it with a fabric clip, repeating along the bottom so every pleat runs vertically. Keep the folds shallow enough for light to pass through.
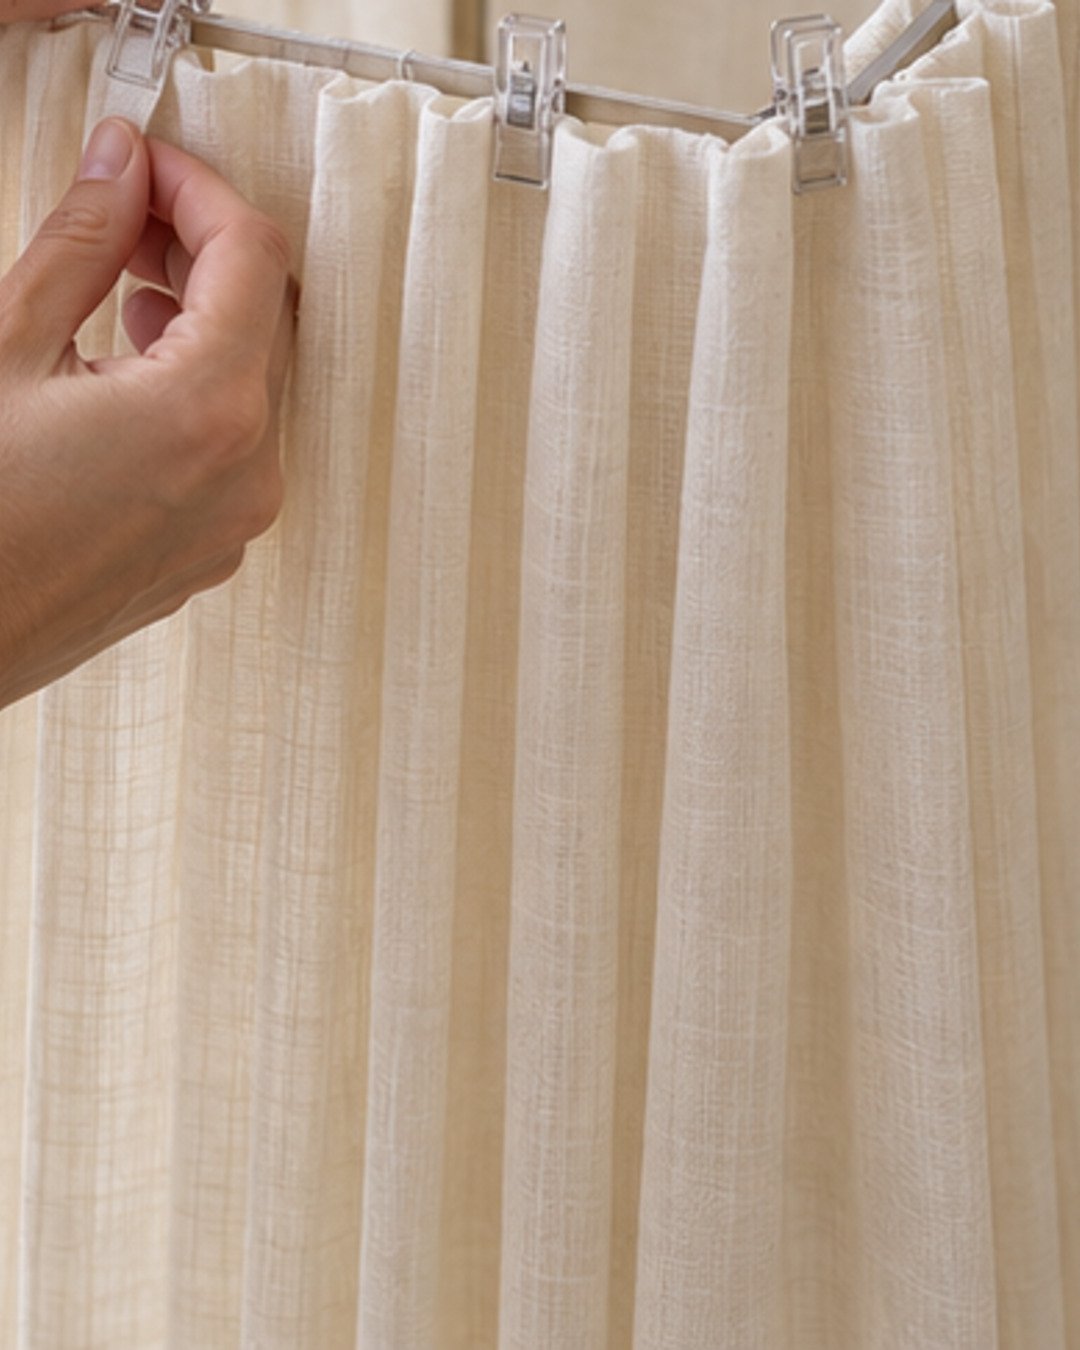
4. Wrap and Close the Shade
Wrap the pleated panel around the frame without stretching it. Overlap the back edges by about 1 inch and close them with hidden hook-and-loop dots, hand stitches, or clips. Turn the top and bottom allowances inward and secure them to the rings. Keep the rear seam facing away from the aisle.
5. Install and Test the Lights
Insert fresh batteries and program every timer before the shades are placed. Set all candles side by side for a 30-minute test, confirming that the color temperature and brightness match. Label remotes and store spare batteries with the event emergency kit.
6. Stage the Aisle
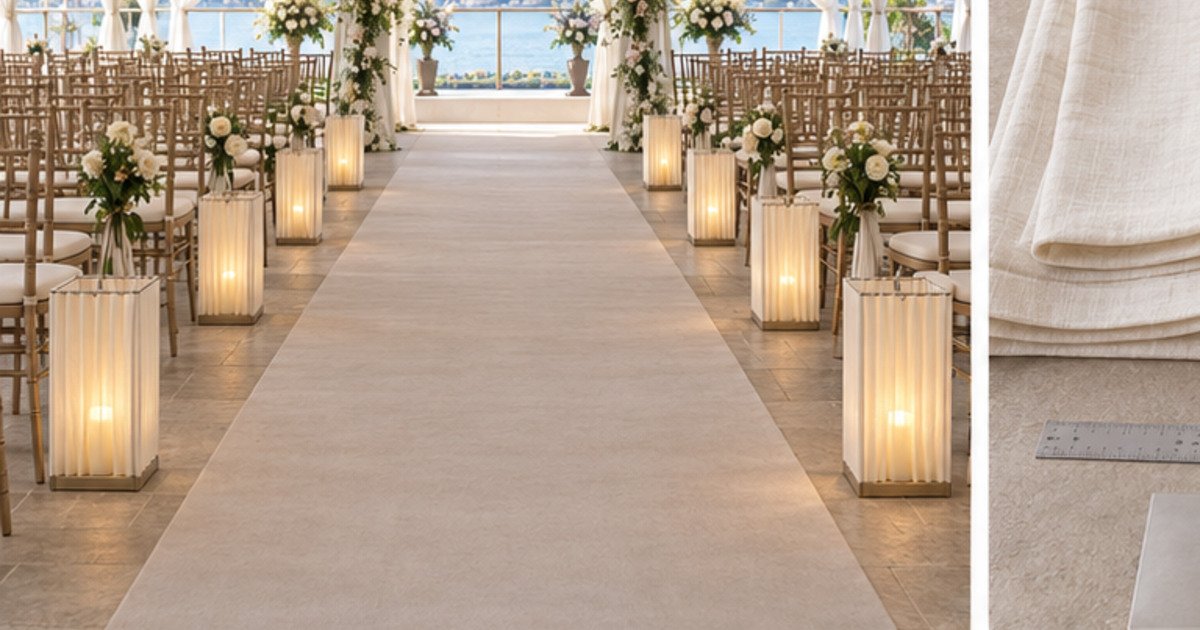
Place the tallest lanterns toward the altar and the shortest near the entrance, or alternate heights for a more editorial rhythm. Maintain at least 6 inches between the lantern edge and the guest walking path. Use clear museum gel or concealed low-profile base weights only if the venue permits them.
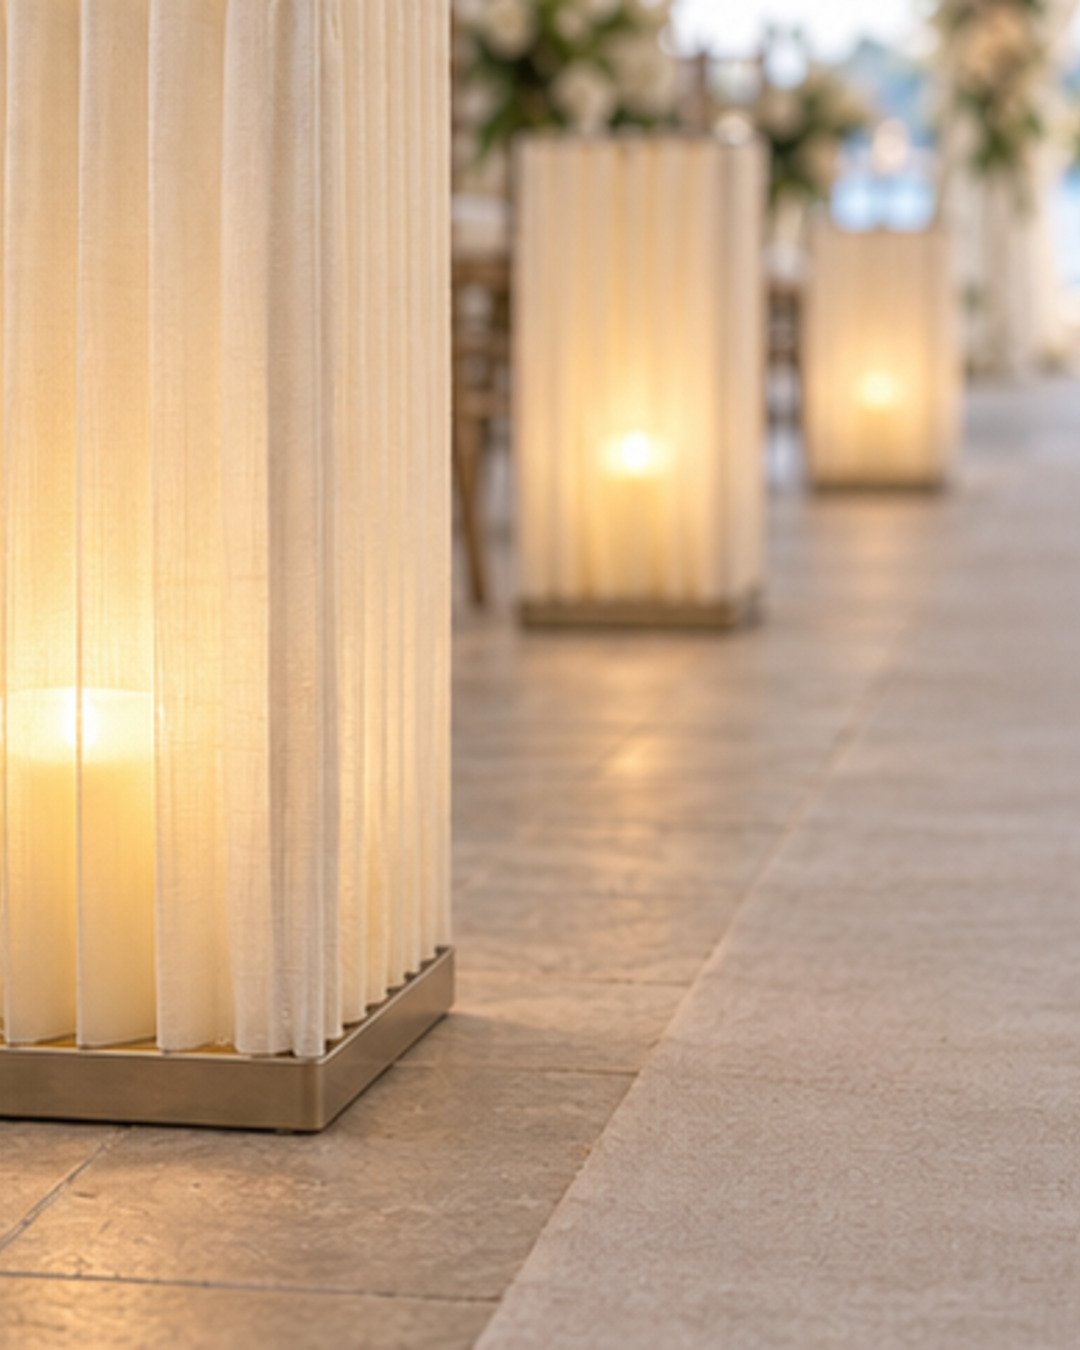
7. Complete the Final Reveal
Dim the room to the expected ceremony level and view the entire aisle from the entrance, first row, and altar. Rotate any visible seams, straighten pleats, and confirm that bags, cables, clips, and spare supplies are out of sight.
Budget Guidance
Make the frames reusable and replace only the fabric when the palette changes. Linen-look polyester is often more affordable and resists wrinkles better than pure linen. Spend on LEDs with consistent warm color and dependable timers; mismatched light tones are noticeable in photography. Renting frames may be smarter for a single event, especially when delivery and storage are concerns.
Troubleshooting
- Pleats lean sideways: realign the top and bottom fold marks and add a central temporary clip while wrapping.
- The light looks harsh: raise the candle, reduce brightness, or add a separate diffusion sleeve.
- The shade collapses: add another vertical support or use a fabric with more body.
- Lanterns look crowded: remove one pair rather than narrowing the walking aisle.
- Remote controls interfere: test groups in advance and label which remote controls which candles.
Safety Notes
Use flameless LEDs only—never real candles, fuel lamps, or heat-producing bulbs inside fabric shades. Keep lanterns outside the required aisle width and emergency paths. Do not cover floor lights, electrical outlets, signs, sprinklers, or HVAC vents. Confirm the venue’s rules for floor adhesives, weights, and battery-operated décor.
Frequently Asked Questions
Can I use paper instead of linen?
Flame-retardant decorative paper can create a similar look, but it creases more easily during transport. Linen is more forgiving and reusable.
How many lanterns do I need?
For a 30- to 40-foot aisle, six to ten lanterns usually create a deliberate rhythm without clutter. Start with the aisle length and required clear width, then adjust spacing.
Can these be used outdoors?
Only in a fully sheltered setting with stable bases. Wind can turn tall lightweight shades into hazards, and moisture can affect fabric and batteries.
Where can I get feedback on my plan?
Share your measurements and inspiration inside the Elegant Creators Community, or find fabrication and rental help through the Vendors List.
Final Checklist
- Only cool, battery-operated LEDs are inside the shades
- Every base is stable and outside the walking path
- Pleats run vertically and rear seams face away from guests
- All timers and remotes have been tested
- Spare batteries are accessible to the event team
The beauty of this installation comes from repetition: a simple linen fold, a warm pool of light, and a measured procession down the aisle. Keep the mechanics discreet and the walkway clear, and the result will feel calm, modern, and luxurious.

Join the conversation
What do you think?
Share your thoughts, questions or experience with this design. We would love to hear from you.