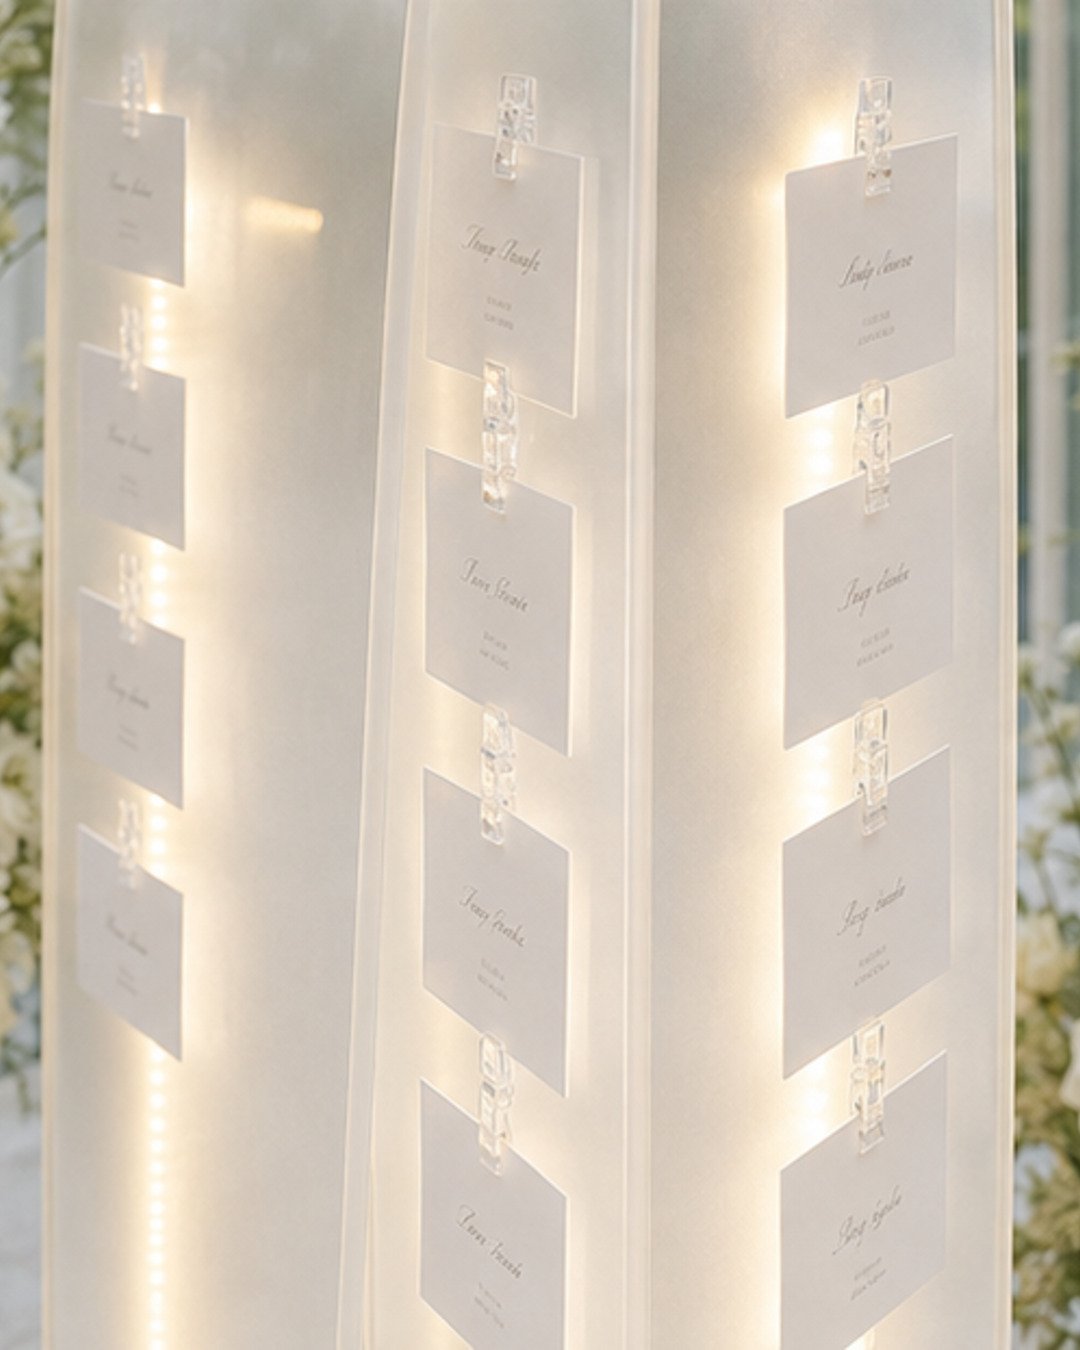
This luminous vellum-sail escort-card gallery turns guest seating information into a sculptural cocktail-hour installation. Seven translucent panels rise in a soft wave, while diffused warm-white light makes every card easy to find without relying on open flame or ceiling rigging.
The full gallery shown here is approximately 12 feet wide, 7 feet tall and 30 inches deep. It is sized for up to 140 escort cards. Allow 5 to 7 hours of off-site preparation and 2 to 3 hours on site with two installers.
Project specifications
- Finished size: approximately 12 feet wide × 7 feet tall × 30 inches deep
- Panels: seven freestanding translucent sails ranging from 48 to 84 inches tall
- Capacity: 16 to 24 cards per panel, depending on card size
- Lighting: dimmable 3000K warm-white LED strips with diffusers
- Best for: weddings, anniversary dinners, galas and corporate receptions
Materials plan
Use rigid translucent polypropylene or professionally fabricated frosted acrylic for the structural sails. Vellum paper is ideal for mockups, surface layers and the escort cards themselves, but ordinary paper should not be expected to stand seven feet tall. Each sail needs a rated base, an upright support and protected low-voltage wiring.
Supplies and tools
As an Amazon Associate I earn from qualifying purchases.
ESSENTIAL SUPPLY
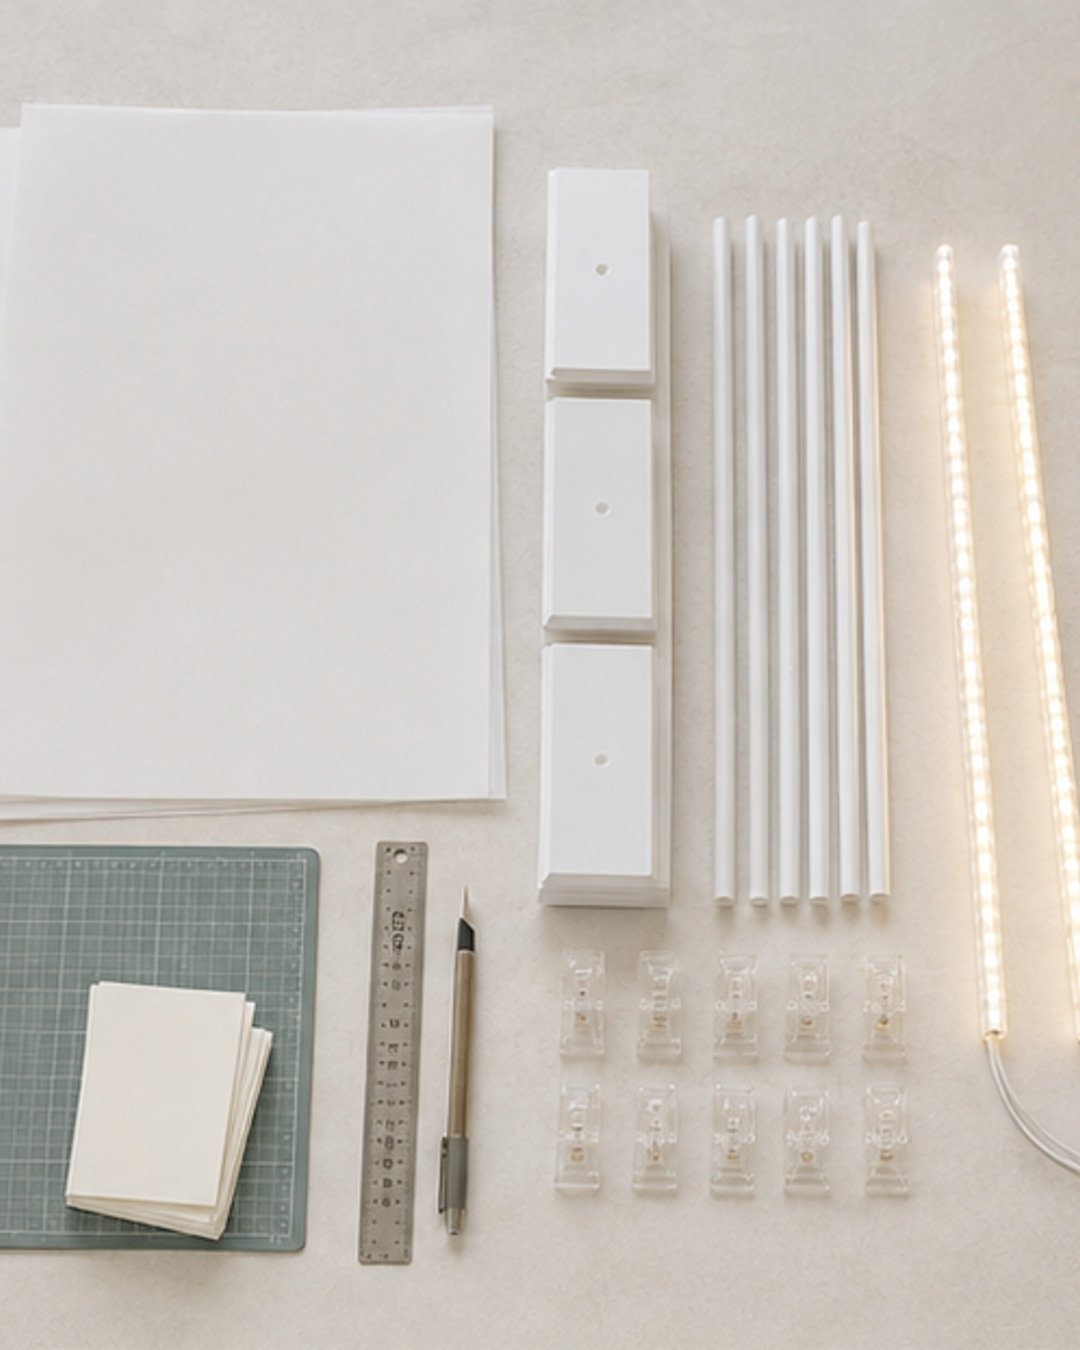
Clearprint Translucent Vellum Pad
Use translucent vellum for card prototypes, printed escort cards and layered surface details. Test your printer settings before producing the full guest list.
ESSENTIAL LIGHTING
Govee 3000K Dimmable Warm-White LED Strip
A dimmable warm-white strip creates the glow behind each sail. Install it in a diffuser channel and keep the listed power supply ventilated and accessible.
ESSENTIAL SUPPLY
Mini Transparent Photo Clips
Clear clips keep escort cards replaceable and readable without introducing a dark fastening line. Order enough for every card plus replacements.
ESSENTIAL TOOL
Self-Healing Mat, Craft Knife and Metal Ruler Set
A protected cutting surface and metal straightedge help produce clean prototypes and card layers. Replace dull blades and keep the cutting station away from guests.
CUSTOM STRUCTURE
Freestanding Sail Frames and Bases
The large structural panels and their bases should be fabricated or rented for the intended height, material and venue. Use the Elegant Creators Vendors List to find qualified acrylic, signage or event-display professionals.
You will also need diffuser channels, low-voltage cable covers, surge-protected power distribution approved by the venue, spare escort cards, removable labels, cotton gloves, a laser level and moving blankets.
Step 1: Plan the guest-search system
Alphabetize guests by surname and divide the list evenly across seven panels. Keep couples or households together when possible. Print a small panel letter or alphabetical range at eye level so guests do not have to scan the entire installation.
Step 2: Build a full-size paper template
Draw each sail on kraft paper first. Use heights of approximately 84, 76, 68, 60, 56, 52 and 48 inches. The curved top edges should feel related but not identical. Place the templates in the venue footprint and confirm that the tallest panel does not block signage or sightlines.
Step 3: Fabricate and test the structural panels
Have the final sails cut from the material specified by your fabricator. Every panel must seat fully in its base without bowing. Test the complete installation off site, including wiring, before applying cards. Do not substitute thin craft vellum for a structural panel.
Step 4: Add diffused low-voltage lighting
Install LED strips inside diffuser channels behind the inner edge of each sail. Keep dots of light from facing the guest directly. Label each cable, secure connections, and route cords behind the bases into approved floor covers. Never bury a power supply inside paper or fabric.
Step 5: Print and proof every escort card
Use 3.5-by-2-inch cards with high-contrast type. Print at least five blanks and a full duplicate set. Confirm names, table numbers and meal indicators against the final guest spreadsheet before clipping anything to the sails.
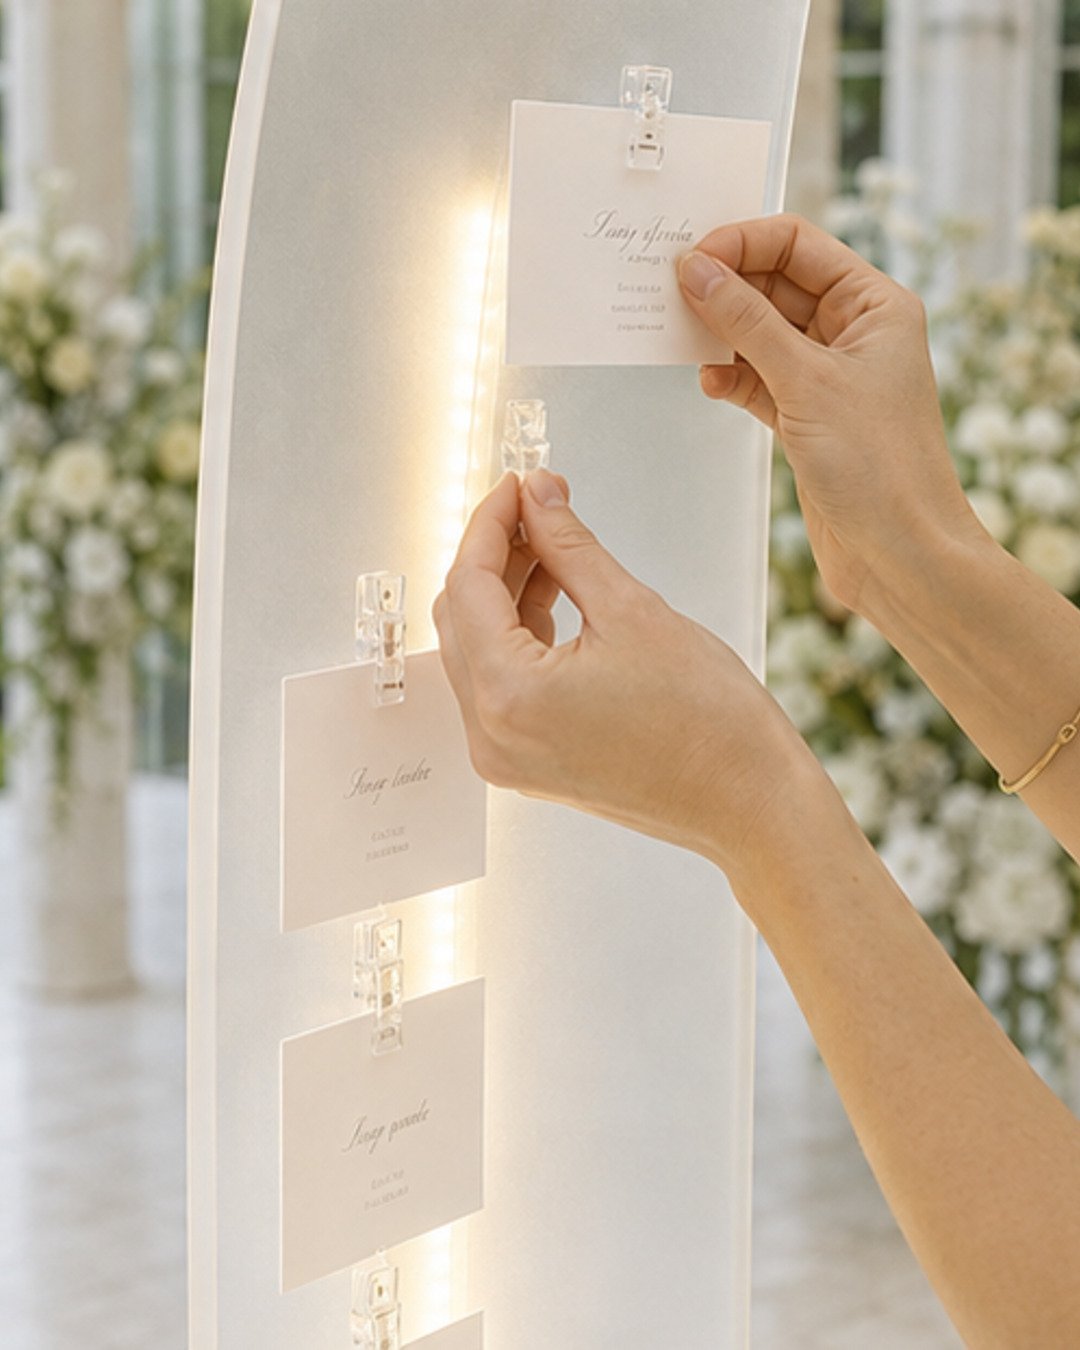
Step 6: Establish measured card rows
Mark a removable centerline on the back of each panel. Leave at least 2 inches between cards and 5 inches at the panel edges. Start at eye level, then build rows upward and downward. Keep the lowest card at least 28 inches above the floor so guests do not have to crouch.
Step 7: Install from the center outward
Place the tallest sail first, then alternate left and right while checking the wave silhouette. Ballast and level every base before connecting power. Maintain the venue’s required accessible route and keep the search area outside the main doorway queue.
Step 8: Conduct the final guest-flow test
Dim and raise the room lighting through its expected range. Confirm that cards remain readable without glare. Ask two people to locate sample names while others walk behind them. If the search area becomes congested, increase the space in front of the display or add a small alphabetical directory at the entrance.
Budget and pricing guidance
Price the structural sails, fabrication, printing, clips, lighting, electrical protection, labor, delivery, installation and strike separately. The guest-list management time is real labor. Use the Elegant Creators Profit Calculator so revisions and on-site support do not disappear from the quote.
Troubleshooting
The LED dots are visible
Move the strip deeper into the channel, add a frosted diffuser or increase the distance between the light and the face panel.
The panels bow or wobble
Stop installation and consult the fabricator. Do not rely on cards, tape or neighboring panels to brace a structural problem.
Guests cannot find names quickly
Increase alphabetical-range labels, improve contrast and move the directory into the natural approach path before the individual cards.
Frequently asked questions
Can I use real candles behind the sails?
No. Use listed low-voltage LED lighting. Keep all paper and translucent materials away from open flame and hot fixtures.
Can the display hold place cards instead?
Yes. Escort cards direct guests to tables; place cards assign seats at the table. Adjust the wording and sorting system to match your event.
How do I scale it for 60 guests?
Use three to four sails and keep the same staggered-height rhythm. Do not reduce the aisle or base-stability requirements.
Continue with Elegant Creators
Use the Vendors List for panel fabrication and printing help, quote the complete service with the Profit Calculator, and share your guest-flow layout inside the Elegant Creators community before production.
Join the conversation
What do you think?
Share your thoughts, questions or experience with this design. We would love to hear from you.