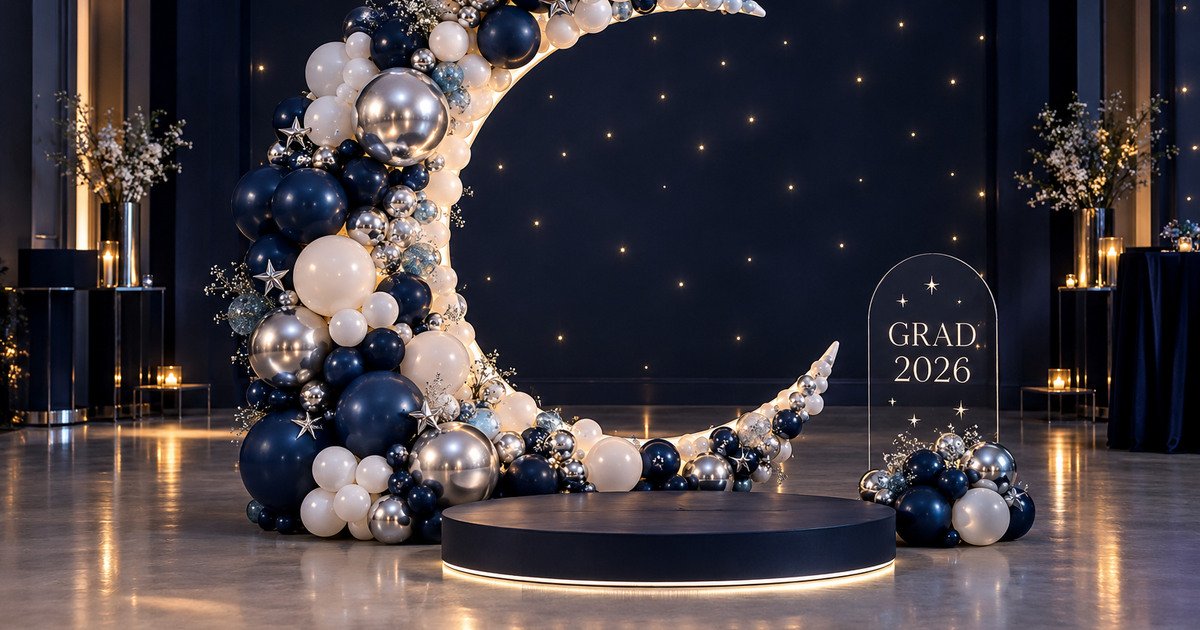
A moon-shaped balloon display gives a graduation party the drama of a custom stage set without turning the room into another standard balloon arch. This version uses a reusable crescent frame, tightly sized balloon clusters, and a slim warm-white light line so the silhouette still reads after sunset.
Project at a glance
- Finished footprint: about 7 feet high × 6 feet wide × 3 feet deep, including the posing platform and required clearance
- Build time: 3–4 hours after the frame has been test-fitted
- Skill level: confident beginner to intermediate
- Best for: graduations, milestone birthdays, prom send-offs, celestial showers, and evening photo booths
- Balloon count: plan by coverage and frame size rather than a rigid number; most 7-foot frames need several mixed-size packs plus backups
Supplies
This post contains affiliate links. If you purchase through them, Elegant Creators may earn a commission at no additional cost to you. As an Amazon Associate I earn from qualifying purchases.
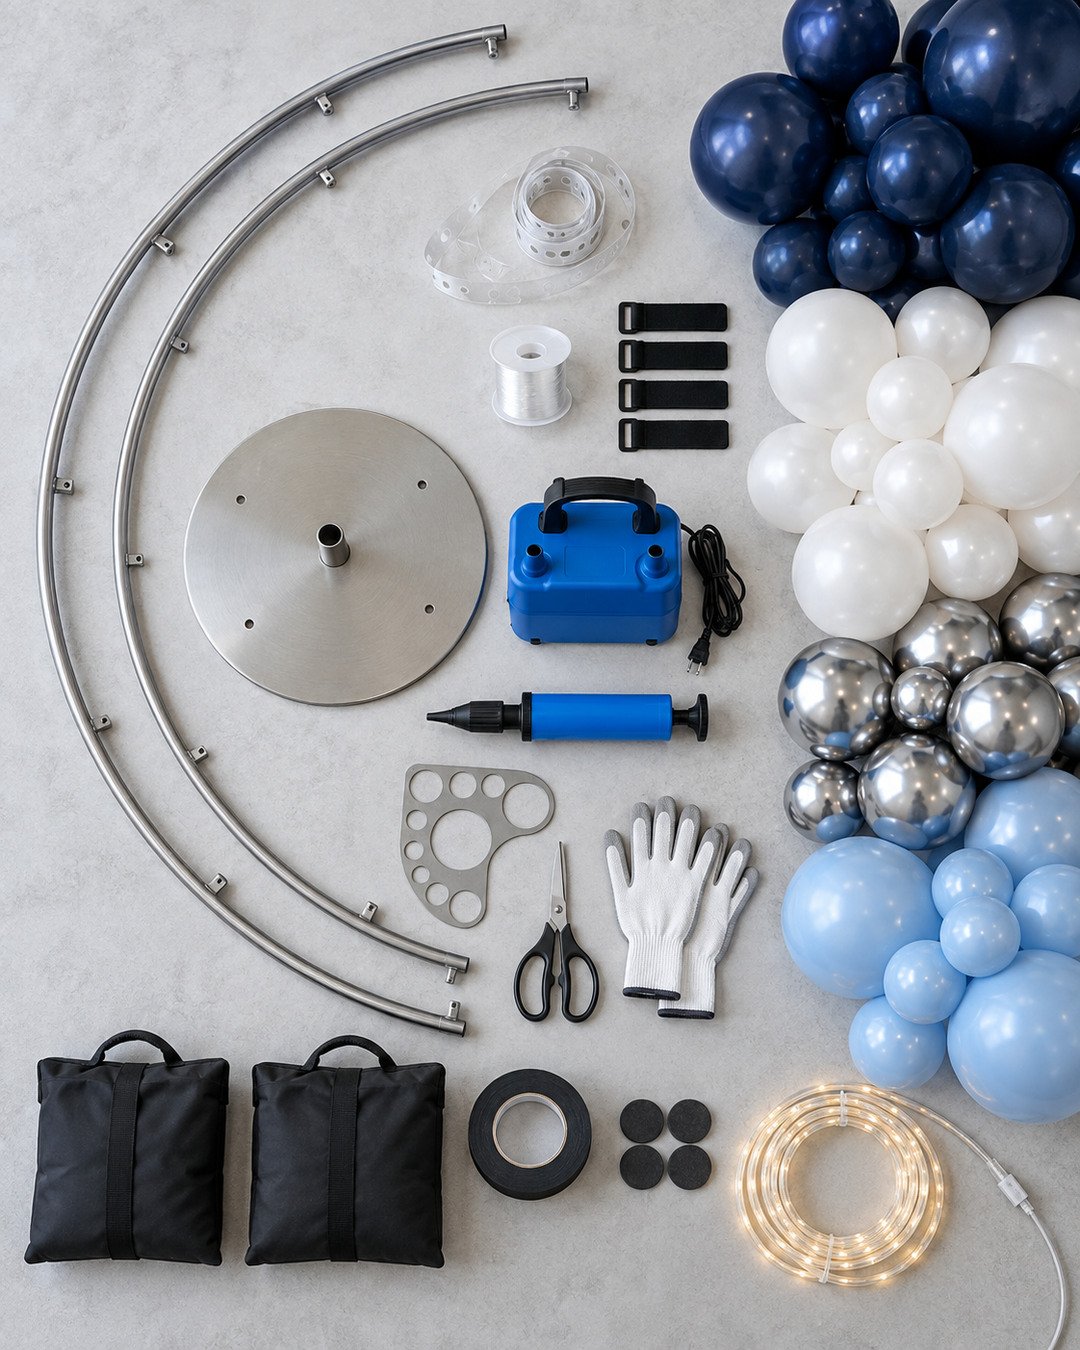
Reusable Crescent Moon Arch Stand
A modular metal crescent provides the clean silhouette and secure attachment points this installation needs.
Click Here to Check Current Options on AmazonPortable Electric Balloon Pump
Speeds up consistent air-filled inflation. Use a sizing guide so the installation looks sculpted instead of random.
Click Here to Check Current Options on AmazonCollapsible Balloon Sizer
Creates repeatable balloon sizes, which makes the crescent curve smoother and the color rhythm more intentional.
Click Here to Check Current Options on AmazonBattery-Operated Warm LED Rope
Defines the inner moon curve without running a loose cord through the guest path. Confirm the battery pack can be hidden and reached.
Click Here to Check Current Options on AmazonRemaining materials
- Air-filled balloons in 5-, 11-, and 18-inch sizes: midnight navy, pearl white, chrome silver, and a restrained icy-blue accent
- Balloon strip or strong clear line, plus removable hook-and-loop straps
- Two concealed sandbags or manufacturer-approved base weights
- Black gaffer tape, felt floor pads, soft gloves, scissors, spare batteries, and an emergency balloon kit
- Optional: metallic stars, a small acrylic graduation sign, or a low circular posing platform
Step 1: Confirm the footprint before decorating
Mark a 6-by-3-foot working zone with painter’s tape, then add at least 36 inches of clear guest circulation in front. Measure ceiling height, doorways, elevators, and the vehicle opening before committing to a fully assembled transport plan. Keep the finished frame away from exit doors, sprinklers, speakers, heaters, and food-service traffic.
Step 2: Build, weight, and protect the frame
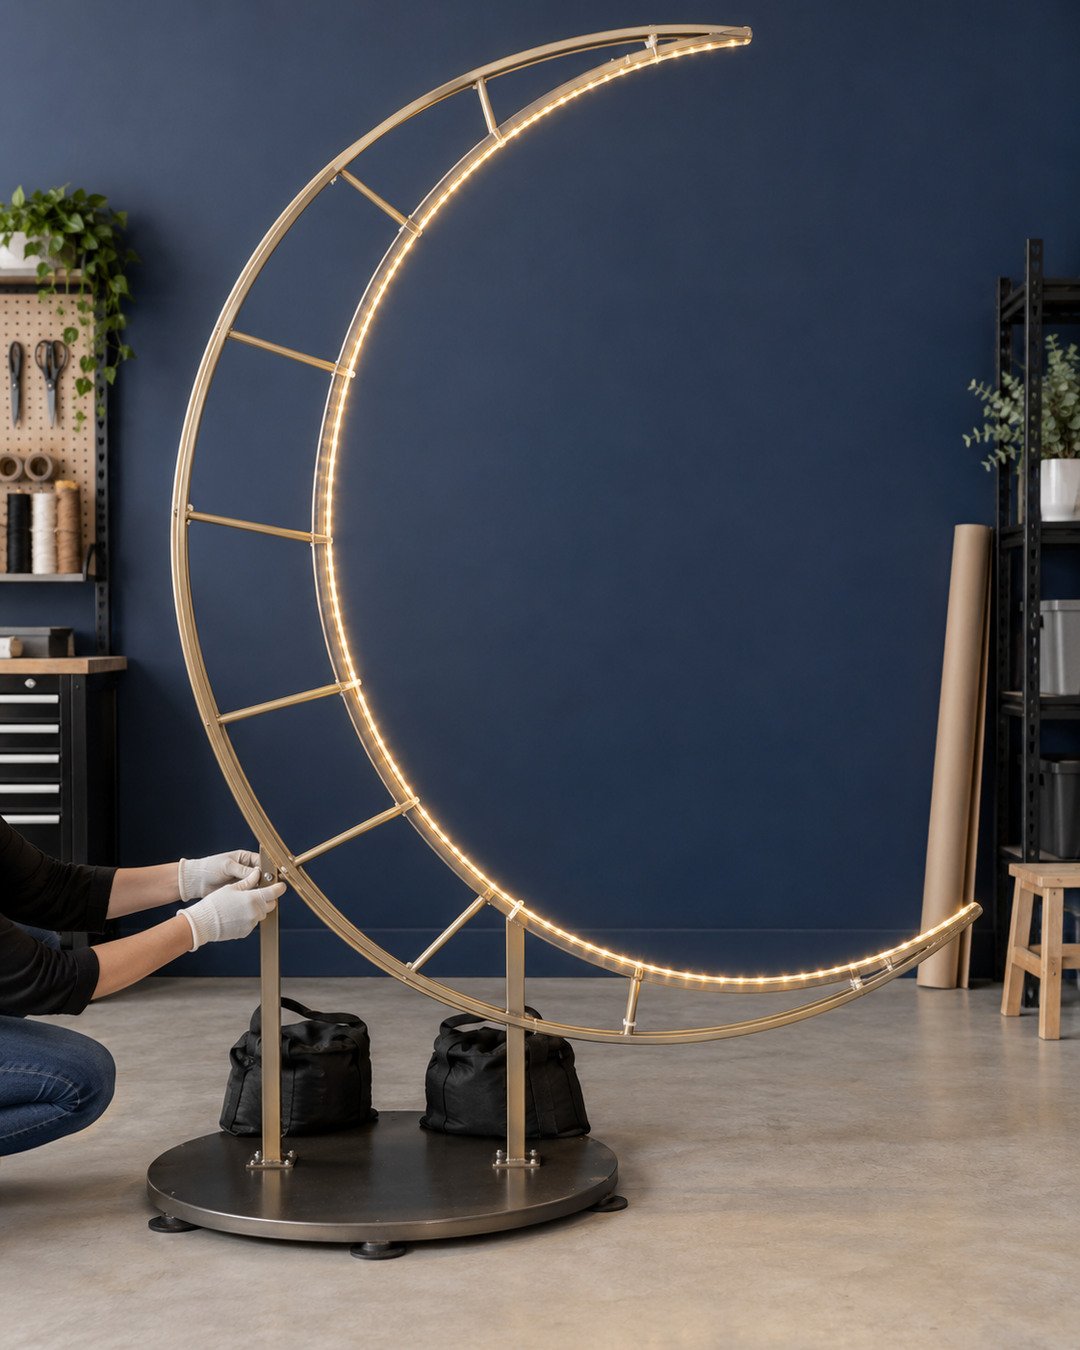
Assemble the frame according to its manufacturer’s directions. Tighten every joint, add felt beneath the base, then secure the recommended weights low and behind the structure. Give the frame a controlled stability test from several directions. If it rocks, fix the base now—balloons will not correct a structural problem.
Step 3: Add the inner glow
Run a low-heat battery LED rope along the inner edge of the crescent. Attach it every 8–10 inches with clear ties or removable straps, keeping the battery pack reachable behind the base. Test the complete light strand for at least 20 minutes before covering any wiring. Do not use hot incandescent lights.
Step 4: Inflate to a controlled size recipe
Create mostly 9–10-inch balloons from the 11-inch stock, with smaller 4–5-inch balloons for finishing and a few 14–16-inch balloons as visual anchors. Slightly underinflated balloons look rounder, photograph better, and tolerate handling. Build navy-and-white quads first, then introduce silver and icy blue as accents rather than equal stripes.
Step 5: Attach clusters from the base upward
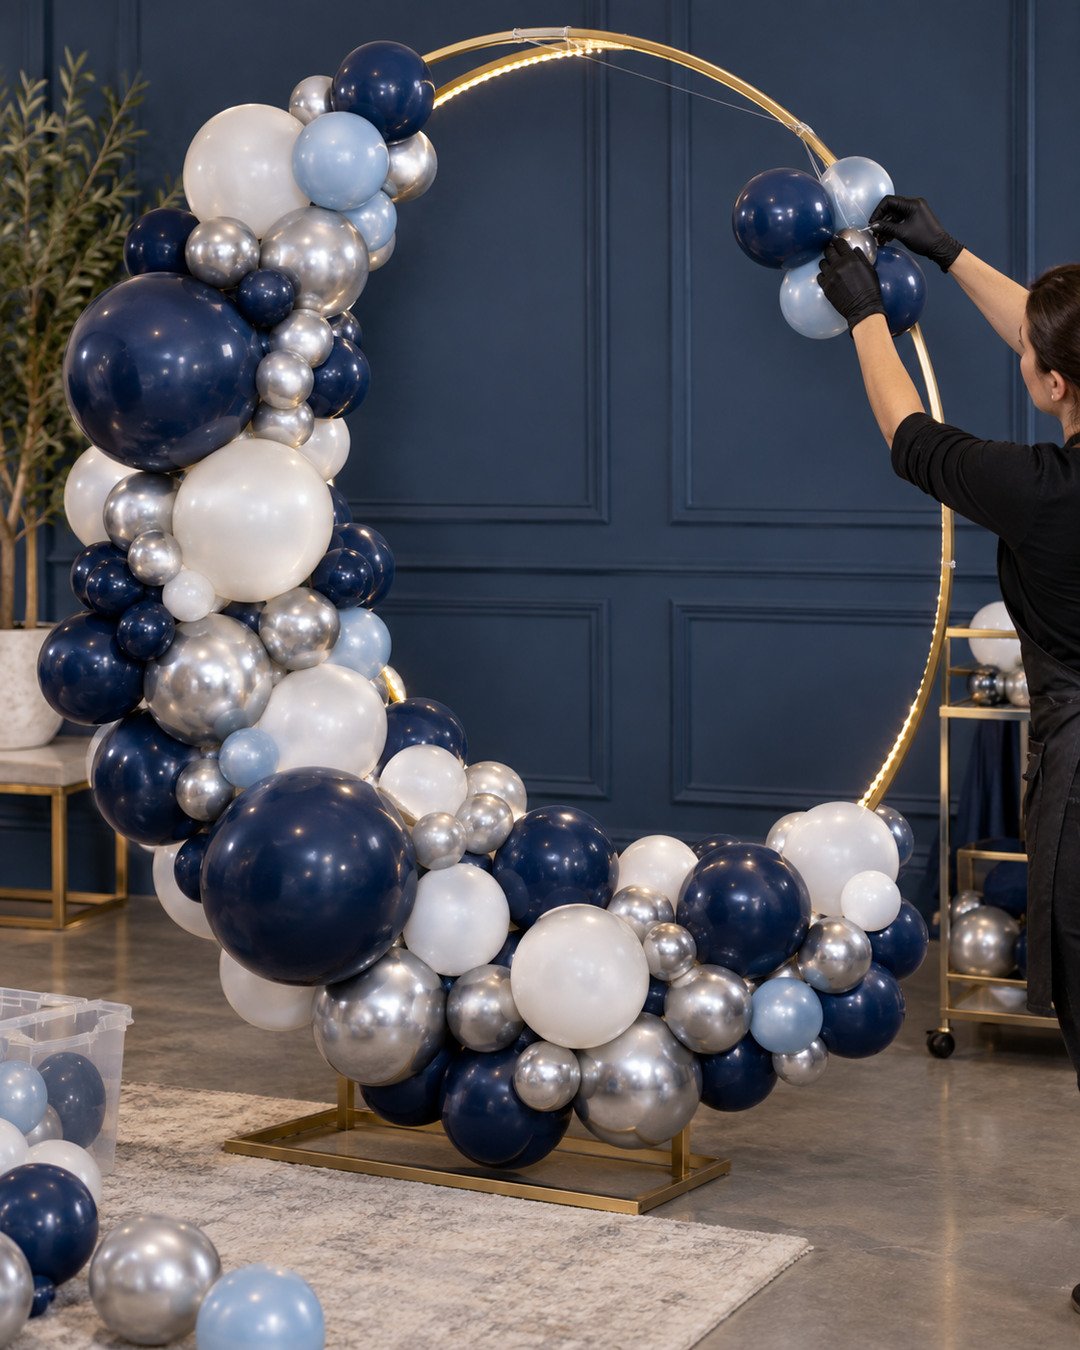
Anchor the densest clusters around the lower third, where visual weight belongs. Spiral upward while alternating scale and color. Connect each section to metal—not to another balloon—at least every 8–12 inches. Step back after every two clusters. The inner opening should stay clean and unmistakably crescent-shaped.
Step 6: Finish the silhouette
Use 5-inch balloons to cover mechanics and abrupt transitions. Place chrome silver near—not directly on—the brightest LEDs to create a reflected glow. Keep embellishments sparse: three to five stars or one small graduation sign is enough. Photograph the piece from the intended camera position before declaring it finished.
Safety and venue protection
- Use only manufacturer-approved bases, connectors, and weights; never rely on balloons for stability.
- Keep weighted bags behind the installation and completely outside the posing area.
- Use felt or venue-approved protection beneath every metal contact point.
- Do not block stairs, exits, alarms, sprinklers, electrical panels, or accessible routes.
- Use cool, battery-operated LEDs and inspect every wire before guests arrive.
- For outdoor use, obtain venue approval and a wind plan. If the frame cannot be safely anchored for current conditions, move it indoors.
- Keep latex balloons away from known latex-allergy areas and supervise children around broken balloon pieces.
Troubleshooting
- The crescent looks like a circle: remove inner-edge balloons and concentrate volume on the outer curve and lower point.
- The colors look striped: break each color into unequal clusters and repeat accents at irregular intervals.
- The installation leans: stop decorating, unload the top section, retighten the frame, and correct the base and weights.
- The lights disappear: move the LED line toward the inner edge and keep chrome balloons a few inches away from it.
- Balloons keep popping: underinflate slightly, remove sharp ties, protect from heat, and replace chrome accents with pearl latex in hot conditions.
Budget guidance
The reusable frame is the main long-term investment. Save by renting a crescent locally, limiting the palette to three balloon finishes, using air rather than helium, and repurposing an existing platform. Spend first on structural stability, reliable inflation, backups, and floor protection. Price-check current options instead of building a quote around a fixed online price, since supply costs and local rental fees change.
Frequently asked questions
Can I build it the day before?
Yes, indoors in a temperature-controlled room. Inflate and assemble the balloon sections the day before, then attach them after the frame is safely positioned at the venue.
Does it need helium?
No. This is an air-filled installation attached to a frame, which is more controllable and reusable than helium for this shape.
How do I transport it?
Transport the frame in its manufacturer-approved modular sections and carry balloon clusters in large clean bags. Final assembly is safest at the venue.
Finishing checklist
- Frame connections tightened and rechecked
- Base weighted and all floor contact points padded
- Moon opening clearly visible from the camera position
- LEDs tested, cool to the touch, and battery pack accessible
- Loose ties, sharp ends, and visible mechanics covered
- Guest path, exits, and accessibility clearance confirmed
- Backup balloons, pump, batteries, tape, and scissors stored nearby
Keep creating with decorators who understand the work
Share your finished installation, ask mechanics questions, and trade practical ideas inside the Elegant Creators community.
Join the conversation
What do you think?
Share your thoughts, questions or experience with this design. We would love to hear from you.