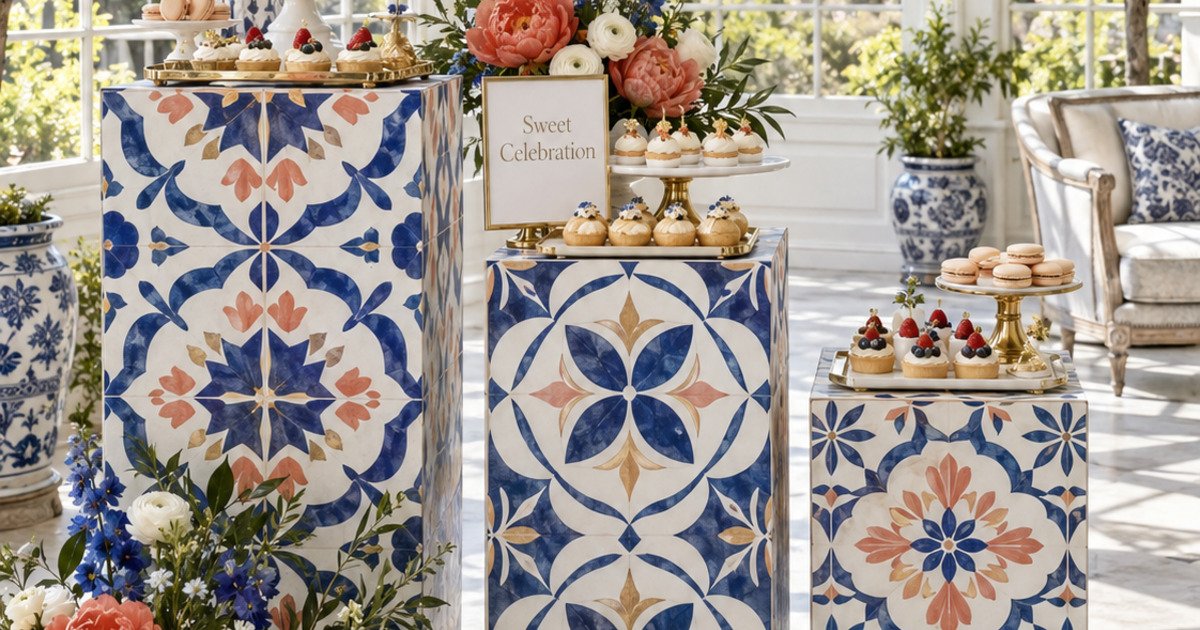
A dessert station can feel custom-built without requiring permanent tile, heavy masonry, or a one-use structure. These three DIY dessert plinths begin with reusable rectangular pedestal boxes and gain their Mediterranean character from removable patterned vinyl, slender gold edge trim, and clear protective tops.
The finished cobalt, coral, ivory, and brushed-gold palette is joyful enough for a bridal shower, yet refined enough for an engagement party, milestone birthday, or summer wedding welcome reception.
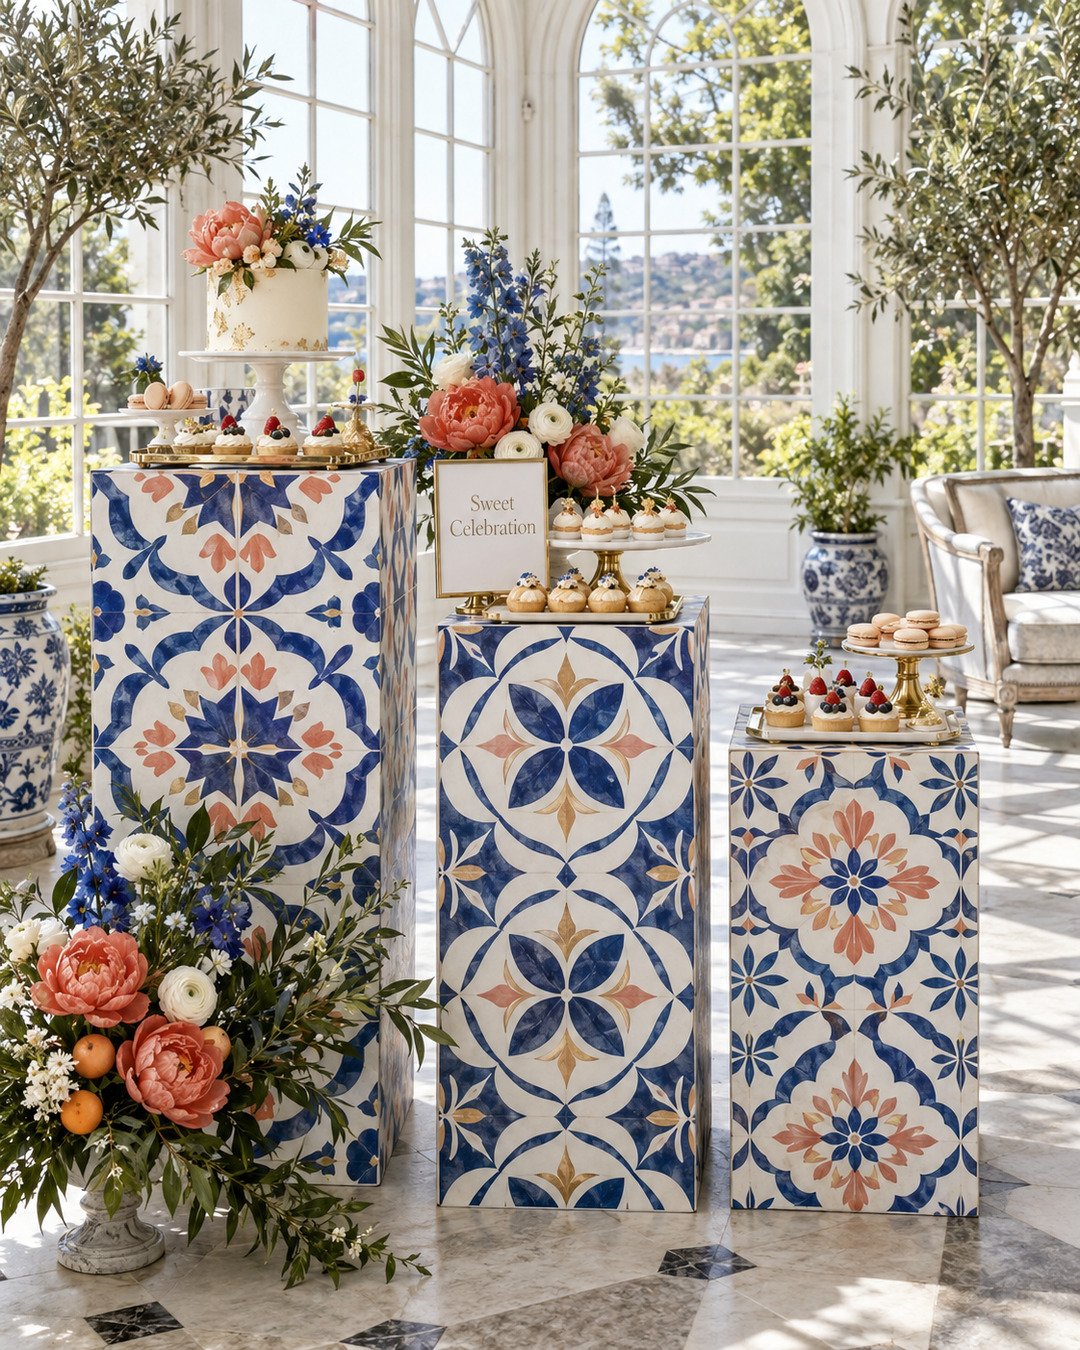
Project at a glance
- Finished footprint: approximately 72 inches wide by 28 inches deep, including safe spacing and modest floral accents
- Suggested plinth sizes: 16 × 16 × 36 inches, 16 × 16 × 30 inches, and 16 × 16 × 24 inches
- Build time: 3–5 hours, plus testing and final styling
- Skill level: confident beginner to intermediate
- Best for: indoor venues or fully covered, dry outdoor locations
- Reusable elements: pedestal boxes, acrylic tops, edge trim, trays, vessels, and most tools
Supplies
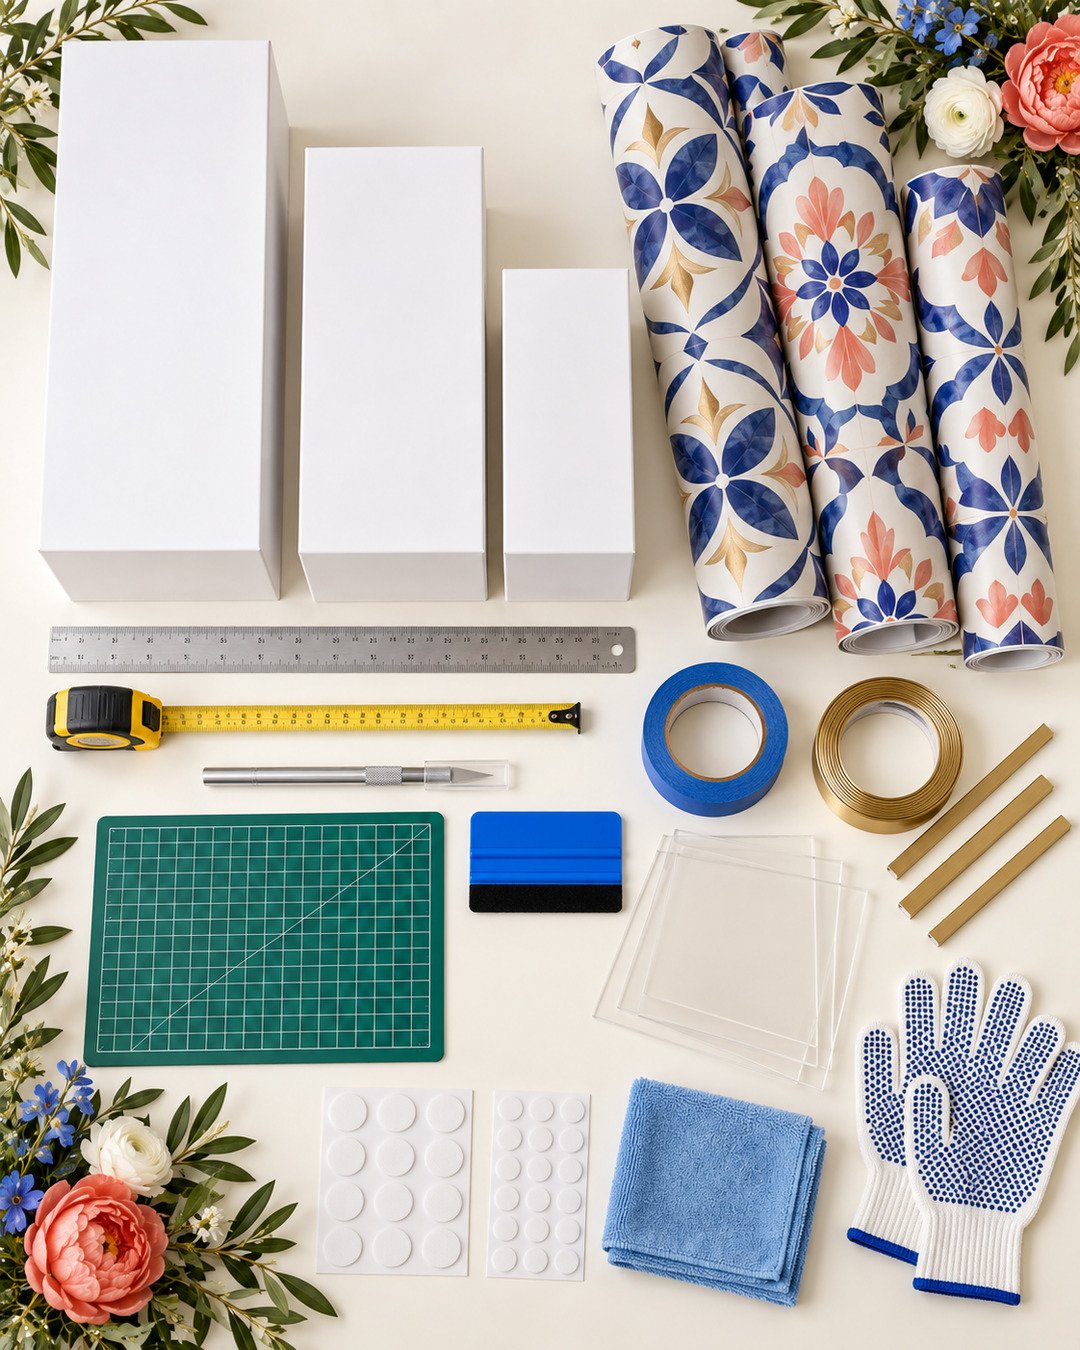
Reusable rectangular display pedestals
Choose sturdy, level boxes with flat sides and an accessible back if you plan to add concealed weight. Confirm the manufacturer’s load guidance before placing food or floral vessels on top.
Removable Mediterranean-pattern vinyl
A repositionable adhesive film creates the visual impact of tile without adding grout, breakable ceramic, or permanent weight.
Vinyl squeegee and precision cutting kit
A felt-edge squeegee helps push air outward while a straightedge and sharp blade create clean seams. Always cut on a mat, away from your body.
Clear acrylic topper sheets
Use a removable, cleanable top barrier sized to the pedestal. Food should still sit on its own cake board, tray, or serving stand rather than directly on decorative vinyl.
Remaining materials and tools
- Painter’s tape for temporary registration marks
- Metal ruler, flexible measuring tape, pencil, and paper
- Cutting mat and spare craft blades
- Microfiber cloth and surface-safe cleaner
- Removable brushed-gold edge trim, optional
- Clear nonslip pads or venue-approved floor protectors
- Concealed sandbags or base weights that fit inside the boxes
- Clear acrylic topper for each pedestal
- Food-safe trays, cake boards, stands, and risers
- Low floral vessels with waterproof liners
- Work gloves, small spirit level, lint roller, and repair kit
Plan the pattern before you cut
Measure each face separately; even manufactured pedestals may vary by a few millimeters. Add about 1 inch of working margin to every panel, then trim after application. For the most convincing tile effect, center one dominant motif on the front of each plinth and keep the visual “grout” lines level across all three boxes.
Lay the three plinths on the floor in their final height order. Photograph the proposed pattern alignment before cutting. That reference image prevents you from rotating a panel or placing two competing motifs side by side.
Step-by-step construction
1. Inspect and clean every surface
Confirm that each pedestal is square, stable, dry, and compatible with removable adhesive film. Clean according to the pedestal manufacturer’s instructions, then allow it to dry completely. Test a small hidden area first; some fresh paints and delicate finishes can lift.
2. Cut the vinyl one face at a time
Transfer the measured dimensions to the back of the vinyl. Use a metal straightedge on a cutting mat and leave a small working margin. Keep the front design visible beside you so the motifs stay upright and coordinated.
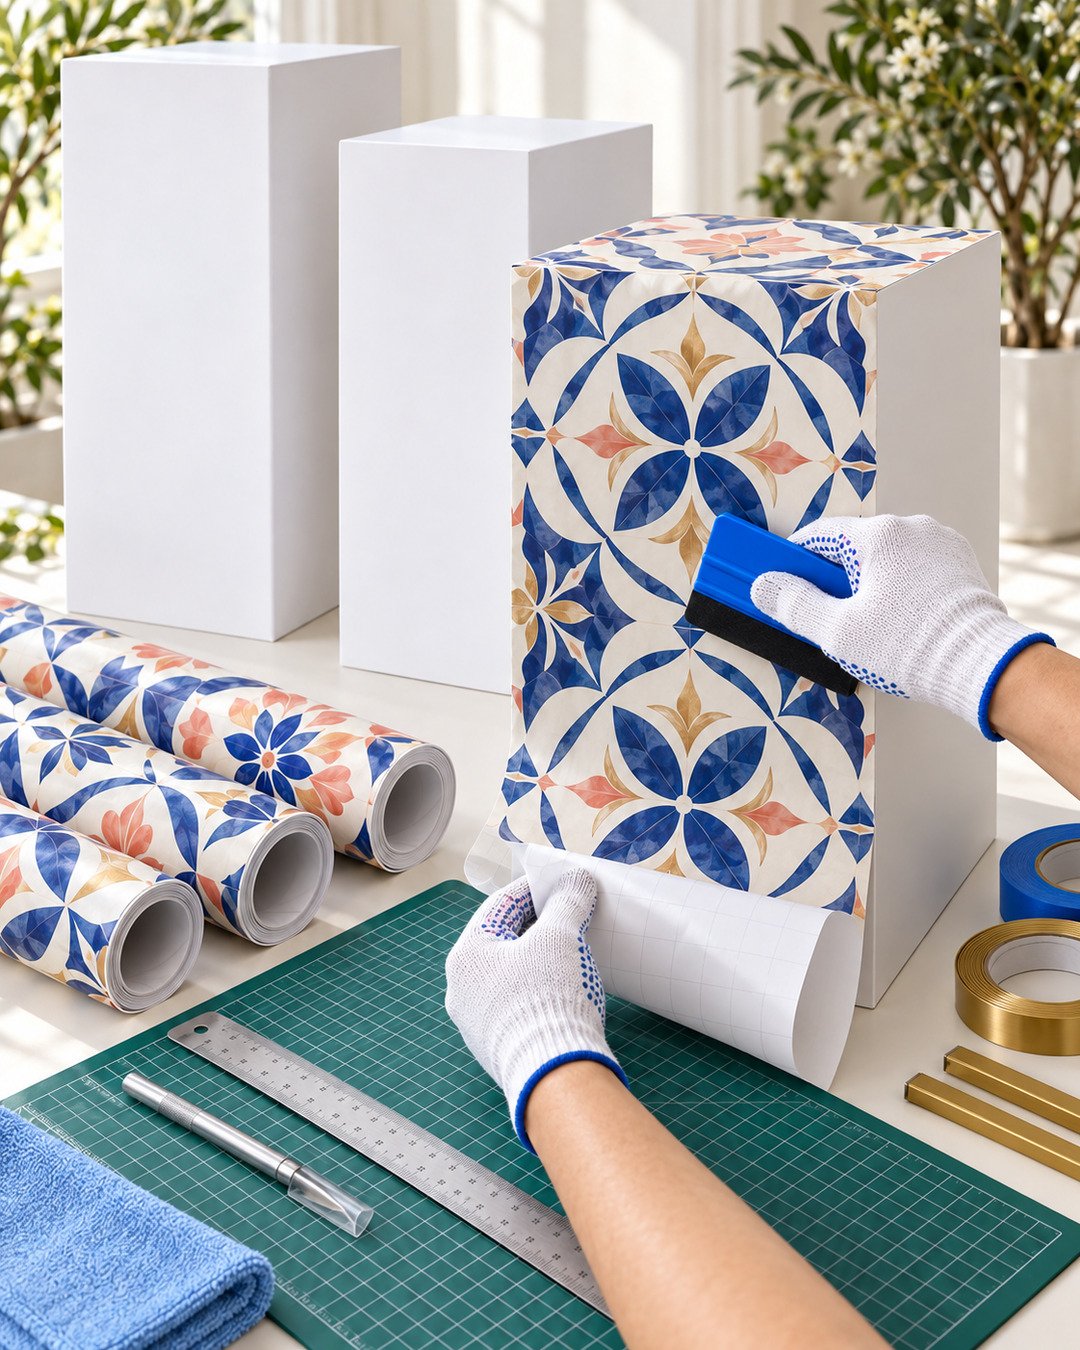
3. Apply from the top edge downward
Use two small pieces of painter’s tape as registration marks. Expose 2–3 inches of adhesive, align the top edge, and press the center first. Pull the backing slowly while sweeping the squeegee outward in overlapping strokes. If the film is repositionable, lift and reset a wrinkled section instead of stretching it.
4. Finish corners and seams
Trim excess with a fresh blade, keeping fingers behind the cutting path. Place side-panel seams toward the rear, not on the focal front. Add removable gold trim only after the vinyl is fully smooth. Do not allow trim to protrude beyond an edge where it could snag clothing.
5. Protect the top
Place clear nonslip dots between each pedestal and acrylic topper. Wipe the top, then add only food-safe serving pieces. Never place unprotected food directly on vinyl or decorative trim.

6. Weight and space the display
Where the structure allows, place a concealed weight low and toward the center of each box. Keep about 8 inches between pedestals so hands can reach trays without brushing the neighboring display. Leave a clear guest path that complies with the venue’s accessibility and egress requirements.
7. Style from largest to smallest
Begin with the largest cake or tray on the tallest stable surface, then distribute smaller desserts across the remaining two. Keep heavy objects centered. Add florals last, using waterproof liners and low vessels. The patterned fronts are already strong, so allow some undecorated space around them.
Optional upgrades
- Change only the removable wrap to reuse the same boxes for another palette.
- Add a small coordinating menu card in a weighted frame.
- Use one mirrored tray for contrast, but avoid stacking multiple slippery surfaces.
- Install battery-operated pin lights only when their bases and cords can be fully secured away from food.
Safety and venue protection
- Obtain venue approval for adhesive materials, floor pads, placement, and electrical accessories.
- Never exceed the pedestal manufacturer’s load rating; when a rating is unavailable, keep styling lightweight and use a different certified structure for a heavy cake.
- Use flameless candles near food, florals, fabric, vinyl, and guest traffic.
- Keep blades capped when not in use and remove cutting debris before food arrives.
- Protect marble, wood, and finished floors with venue-approved nonslip pads—never loose fabric.
- Place liquids in waterproof containers and inspect for leaks before styling.
- Do not use this lightweight decorative setup in wind, rain, or an uncovered outdoor location.
Troubleshooting
The wrap has bubbles
Pierce only tiny isolated bubbles with a fine pin and smooth outward. For a large crease, lift the nearest edge and reapply slowly instead of forcing the wrinkle flat.
The pattern does not align
Prioritize the front face. A clean, deliberate seam near the back looks better than stretching the print or creating a crooked “grout” line.
The plinth rocks
Remove styling immediately. Check the floor with a level and use only stable, manufacturer-approved leveling feet or shims. Do not hide instability under fabric.
The display looks busy
Reduce floral volume, use solid white or clear serving pieces, and repeat one brass finish. Let the patterned fronts provide most of the visual movement.
Budget guidance
Spend first on reusable, load-appropriate pedestal boxes and protective tops. Save by choosing removable vinyl instead of permanent tile, using serving pieces you already own, and wrapping only the visible front and side faces when the backs will face a wall. Compare total delivered cost, usable dimensions, return terms, and reusability rather than relying on a single advertised price.
Frequently asked questions
Can I apply the vinyl directly to rental plinths?
Only with written approval from the rental company and after a hidden adhesion test. A fitted removable sleeve or freestanding printed panel may be safer for delicate finishes.
Can a tiered cake sit on the tallest plinth?
Only if the pedestal has a documented load capacity, is completely level, and the cake professional approves the support. Otherwise place the cake on a certified cake table and use the plinths for lighter desserts.
How do I transport the wrapped plinths?
Cover each face with a clean soft moving blanket, keep boxes upright, and prevent straps from rubbing the finished surfaces. Transport acrylic tops separately with edge protection.
Can I use real ceramic tile instead?
Real tile adds substantial weight, sharp breakage risk, grout maintenance, and transport complexity. Use it only on a purpose-built load-rated structure—not as a casual substitution on lightweight event boxes.
Finishing checklist
- Pattern motifs are upright, centered, and level.
- All seams and trim ends are secure and positioned away from guests.
- Every pedestal is level, weighted, and within its load guidance.
- Acrylic tops and food-safe serving pieces are clean and nonslip.
- Floor protection is approved and does not create a trip edge.
- Liquids are lined and flameless candles are used.
- Guest circulation and venue egress remain clear.
- The repair kit and cleanup plan are accessible.
Find the right makers and rental partners
Need specialty plinths, custom wraps, florals, or event rentals for your own version? Explore the Elegant Creators Vendors List to connect with professionals and suppliers who can help bring the design together.

Join the conversation
What do you think?
Share your thoughts, questions or experience with this design. We would love to hear from you.